Wednesday, June 23, 2010

Useful vim commands and snippets

In this post, I will list down some useful vim snippets that I've collected throughout my experience with this beast of an application. I will keep updating this list whenever I encounter something new.

All the below shortcuts are executed in COMMAND mode, unless otherwise specified.


:! ...
Executes an external command.
Example:
:!gcc % Invokes gcc on the current file


:<range>!...
Pipes the text that's in the specified range to an external command and reads back the result into the file
Examples:
:1,6!sort
:%!sort Here, the % means 1, $ (from line 1 till the end of file)
:%!xxd Turns the file into a hex dump, with the linux xxd command
:!xxd -r To reverse back to the text
:%!nl -ba or :%!cat -n Number all lines


:r <filename>

Reads an external file and inserts it at the current cursor position
Example:
:r main.c Inserts the contents of main.c in the next line


:r!
Reads in the results of an external command and inserts it in the next line
Example:
:r! ls -l


:.!

Like :r! but inserts the text in the current line
Example:
:.! ls -l


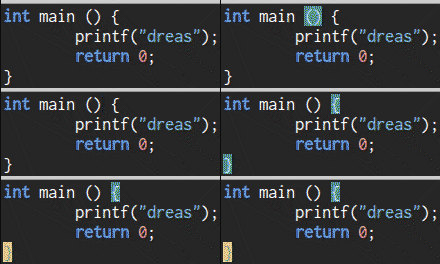
%
Goes to the matching bracket under the cursor
Example:


<action>i...
works on the enclosing text, specificied by the encloser
Examples:
ci{ Change the text between the { }


vi' Visually select the text between '
vi" Visually select the text between "
diw Delete the current word


CTRL + v
Block-select mode


CTRL + a
Increments the number under the cursor


CTRL + x
Decrements the number under the cursor


'.
Jumps back to the last edited line


`.
Jumps back to the last edited word


gi
Like `. but goes into INSERT mode


ga
Displays the ASCII, hex and octal value of the character under the cursor


~
Changes the case of the letter under the cursor


CTRL + r (in INSERT mode)
Examples:
"Unnamed register, containing the text of the last delete or yank
%Current filename
#Alternate file name
*Clipboard contents (X11: primary selection)
+Clipboard contents
/Last search pattern
:Last command-line
.Last inserted text
-Last small (less than a line) delete
=8*5Insert 40 into text (mini-calculator)


(I have written a whole post about CTRL + r)


:Explorer
Opens a built in file explorer

Although vim's inbuilt file explorer suffices, I suggest you use NERDTree for a better file explorer.


:earlier 20m
Reverts the document back to how it was 20 minutes ago


:later 15m
The reversal of :earlier


zz
Scrolls the screen to make the current line in the middle of the page


:changes
View the changelist


g; and g,
Move backwards and forwards through the changelist


ge
Moves the the previous word end


:perldo and :rubydo

Execute a perl or a ruby one liner on a range of text.  If you do not specify a range, the command will execute on all the lines.  In the one liner, $_ refers to the text of the line


Examples:
:perldo $_ = join ' ', reverse split Reverse the words of all the lines
:2,4 rubydo $_ += ";" Inserts a semicolon at the end of lines 2 to 4 (This example can also be achieved with :2,4 s/$/; )


q:
View command history


gf
Tries to identify the word under the cursor as a file name and open it


CTRL + z
Switch back to the shell.  Type in fg to return back to vim


:sh
Go to sub shell.  CTRL + d or type exit to go back to vim


ggg?G
ROT13 the current file


*
Finds the next occurrence of the word under the cursor


#
Finds the previous occurrence of the word under the cursor


:set cul
Highlights the line containing the cursor


:set nu
Turns on line numbers in the left margins


:set autochdir
Set the working directory to the location of the current file


:set so=3
Scrolls the text so that (when possible) there are always at least three lines visible above the cursor, and three lines visible below the cursor
Examples:
:set so=999 Keeps the cursor in the middle line, whenever possible


:set showcmd
Shows the command keystrokes as they are being inputted, at the bottom right of the screen


gg=G
Corrects indentation for the whole file


guu
Lowercase the entire line


gUU
Uppercase the entire line


xp
Transpose two characters (switch their positions).  This is a simple cut (x) and paste (p) after the cursor operation.


CTRL + v (INSERT mode)

Enter a character from its hexadecimal value


CTRL + y (INSERT mode)

Inserts the character above at the current cursor position


CTRL + w (INSERT mode)

Deletes the previous word


gk
Go up one visible line


gj
Go down one visible line


:tab help ...
Open help in a new page
Examples:
:tab help shiftwidth Opens the help for shiftwidth in a new tab


:qa
Close all windows and tabs (:qa! to force it)

Monday, June 21, 2010

Extending vim with the Expression Register

If you press <C-r> (CTRL + r) in vim while in INSERT mode, you will have access to the expression register. This register allows you to execute some commands while in INSERT mode.

For example, if you press <C-r> and then " you will insert the text of the last delete (or yank) from the unnamed register. The following is a list of what you can insert:

"Unnamed register, containing the text of the last delete or yank
%Current filename
#Alternate file name
*Clipboard contents (X11: primary selection)
+Clipboard contents
/Last search pattern
:Last command-line
.Last inserted text
-Last small (less than a line) delete
=Explanation ahead

To view the contents of each of your registers, use :registers

The = sign

The = lets us to access vimscript functions. This means that by using a function like system, we are able to call external utilities and redirecting their output back to our text.

As an example, let's say we want a way to insert a random number between 0 and 100 in vim. The following is a very simple ruby script that generates this random number and prints it on stdout:

#!/usr/bin/ruby

print rand(100)

For the sake of this example, let's say this script is saved at ~/ruby/random.rb

We can now press <C-r> (while in INSERT mode) and when pressing =, we get a mini terminal at the bottom where we can type in the vimscript. Using the system function, we type the following to execute the ruby script, press Enter, and get its output:

=system('~/ruby/random.rb')

A random number should then be inserted in your text.

Now we are going to map a key combination that will let us access the script easier:

:imap <C-j>d <C-r>=system('~/ruby/random.rb')<CR>

imap allows you to map a key in INSERT mode and <CR> means Carriage Return, which basically simulates an 'Enter' press.

Now when we press <C-j>d (CTRL + j, d), we should get a random number inserted in our text from the ruby script.

The mini calculator

As a side note, with <C-r>= you also have a mini calculator in your hands! Try something like this:

<C-r>=5 * 3 + 4<CR>

Try it, and you'll see 19 in your text.

Friday, June 4, 2010

Brainfuck Wallpaper

Tired of your current wallpaper that's been on your screen forever? Maybe it's not geeky enough for you?

Well here's something for you:


For those of you who can't read, it's the word "geek" (without the quotes) in brainfuck. You can try it with this online Brainfuck Interpreter:


+++++[>+++++[>++++<-]<-]>>+++.--..++++++.


Here are some sizes I made:


Sunday, May 30, 2010

Nil-coalescing in Ruby

In Ruby, you can check if an object is nil with the nil? method:

if @foo.nil? then
    @foo = Foo.new
end

But this can be shortened via the || operator:

@foo = @foo || Foo.new

Better yet, we can shorten it even more with the ||= operator:

@foo ||= Foo.new

Both the above assignments assign Foo.new to @foo if and only if @foo is nil or false, else leave @foo as it is.

Saturday, May 15, 2010

Compiling a LaTeX document with Bibtex references

To successfully compile a LaTeX document with Bibtex references, you need to execute 4 steps.

In this case, I'm assuming my document is called MyTexDoc.tex and I want to compile to the pdf file format; for the dvi file format, change the below commands to latex instead of pdflatex.

1. pdflatex MyTexDoc Creates .aux files which include the keywords of your citations
2. bibtex MyTexDoc Extracts cited publications from the .bib file file, using the .aux file and formats them according to your indicated bibliography style. Finally the results are put into a .bbl file
3. pdflatex MyTexDoc Inserts the appropriate reference indications at each citation according to your indicated bibliography style
4. pdflatex MyTexDoc Refines citation and cross references, page formatting and page numbers

Ideally, the above are stored in a shell script (Linux) or batch file (Windows) and execute that file whenever you need to compile the document.

Wednesday, May 12, 2010

Ubuntu with multiple monitors having multiple panels (taskbars)

The following is how I enabled multiple panels (taskbar in Windows) in Ubuntu for my, currently two, monitors and my nvidia card. In this tutorial, the words panel and taskbar will be used interchangeably.

First, go to your nvidia settings page with: sudo nvidia-settings and in the X Server Display Configuration section, set the Configuration of monitors to TwinView. Apply and Save to X configuration File.

After all that, Log Out so that the X Server can be restarted and your settings can be applied.

When you now log in, you should have your multiple monitors enabled and a desktop that is stretched across the monitors. Now it's time to add a panel (taskbar) to your other monitors.

Right click on your existing panel and select New Panel. Your new panel will now be added to your primary monitor. Right click on it and set it's Orientation to Bottom.

Next, hold the ALT key and drag your newly created panel to the other monitor.

The final step is to set the panel to display the windows that currently on that monitor. To do this, right click on it and select Add to Panel and choose Window List. Now you should see your windows on the new taskbar.

Thursday, May 6, 2010

Translating brainfuck code to ANSI-C code with BrainfuckToC

This is my latest project. An application that translates brainfuck code to ANSI-C code.

To download the sources, visit the Google Code brainfucktoc page.

I would also like to thank Reuben Sammut who is a contributer to the project.

Usage

bftoc <source file>

Example:

bftoc bfcode.b

This will take a brainfuck source file and output its equivalent C code.

If you want to redirect the output to a text file, run bftoc as follows:

bftoc bfcode.b > bfcode.c

Examples

Hello World
Input:
++++++++++[>+++++++>++++++++++>+++>+<<<<-]>++.>+.+++++++..+++.>++.<<+++++++++++++++.>.+++.------.--------.>+.>.
Output:
#include <stdio.h>
#include <stdlib.h>

int main () {
    char *ptr = calloc(10000, sizeof *ptr), *start = ptr;
    int i = 0;

    *ptr += 10;
    while (*ptr) {
        ++ptr;
        *ptr += 7;
        ++ptr;
        *ptr += 10;
        ++ptr;
        *ptr += 3;
        ++ptr;
        ++*ptr;
        ptr -= 4;
        --*ptr;
    }

    ++ptr;
    *ptr += 2;
    putchar(*ptr);
    ++ptr;
    ++*ptr;
    putchar(*ptr);
    *ptr += 7;
    putchar(*ptr);
    putchar(*ptr);
    *ptr += 3;
    putchar(*ptr);
    ++ptr;
    *ptr += 2;
    putchar(*ptr);
    ptr -= 2;
    *ptr += 15;
    putchar(*ptr);
    ++ptr;
    putchar(*ptr);
    *ptr += 3;
    putchar(*ptr);
    *ptr -= 6;
    putchar(*ptr);
    *ptr -= 8;
    putchar(*ptr);
    ++ptr;
    ++*ptr;
    putchar(*ptr);
    ++ptr;
    putchar(*ptr);

    free(start);
    return 0;
}