Recently I needed a way to take screenshots of applications programmatically in C# and I wrote this small application to accomplish that task for me.
You can find the source here: https://github.com/dreasgrech/Screenshotter.
The only requirement I had was that I supply the pId (process ID) and the application takes a screenshot of that process for me...but the application can be very easily extended to accept a process name or anything that can identify a process.
Showing posts with label Projects. Show all posts
Monday, October 15, 2012
Sunday, September 23, 2012
Webroulette: Take me somewhere random!
So once again, what follows is the result of a weekend-project-during-the-week kind of thing.
Similar to chatroulette.com where you shuffle through random people, I wrote this so that you can shuffle through random websites instead:
You can also specify a single word to be used as a form of bias:
You can see it in action here: http://dreasgrech.com/upload/webroulette/.
Note that I enforce a hard limit on the range for the allowed values of length; currently, the range is [0, 10]. If no length is specified, I default it to 3.
This is the word-list that I'm currently using is at http://dreasgrech.com/upload/webroulette/komuni.txt
If a bias is specified, I use it as the first word in the phrase and once this phrase is built, it's echoed so that it can be read by the client.
Here are some examples of the script in action:
http://dreasgrech.com/upload/webroulette/louie.php
http://dreasgrech.com/upload/webroulette/louie.php?bias=obfuscation
http://dreasgrech.com/upload/webroulette/louie.php?bias=douglasadams&length=6
What I then show on screen is the first result from the list of google hits from that query.
I figured that this way, I would eliminate the need to use the API (which, btw, has a 100 queries a day limit) but instead use an I'm Feeling Lucky url (like http://www.google.com/search?&btnI=745&q=obfuscation) for the source of the iframe.
But after I tried a couple of queries like this, I realized that sometimes, an I'm Feeling Lucky url redirects to an actual Google Search page and since Google prevents their site to be rendered in an <iframe>, I was getting a lot of blank pages in the <iframe>...and that sucks.
To work around this, I created five projects (i.e. 5 API keys) and whenever someone loads the page, I serve one of the five keys at random. If it turns out that that particular key is used up, the client requests another API key.
You can also specify your own API key (make sure your that the the Custom Search API service is turned on) using the key query string, as follows:
http://dreasgrech.com/upload/webroulette/?key=AIzaSyCCv2V9wF1cO1uck19H5uuAodJ-Ml0rBgg
Similar to chatroulette.com where you shuffle through random people, I wrote this so that you can shuffle through random websites instead:
You can also specify a single word to be used as a form of bias:
You can see it in action here: http://dreasgrech.com/upload/webroulette/.
Source code
As usual, the source for this project resides on github.How it's done
In a nutshell, I basically do a Google Custom Search API call with a randomly constructed query and then show the first result from the collection of hits.The server
On the server, I have a file of ~8.5k commonly used English words, and based on the length query string value, I select a number of these words in a random manner.Note that I enforce a hard limit on the range for the allowed values of length; currently, the range is [0, 10]. If no length is specified, I default it to 3.
This is the word-list that I'm currently using is at http://dreasgrech.com/upload/webroulette/komuni.txt
If a bias is specified, I use it as the first word in the phrase and once this phrase is built, it's echoed so that it can be read by the client.
Here are some examples of the script in action:
http://dreasgrech.com/upload/webroulette/louie.php
http://dreasgrech.com/upload/webroulette/louie.php?bias=obfuscation
http://dreasgrech.com/upload/webroulette/louie.php?bias=douglasadams&length=6
The client
So what the client does is an Ajax call to this PHP script to get the query and then do an Ajax call to the Google Custom Search API to get a list of hits. Btw, I'm also using a query string which I termed iesux which I use for a unix timestamp, and I had to do this because calls to the same url were being cached by Internet Explorer and so I needed this timestamp to introduce variety to the urls.What I then show on screen is the first result from the list of google hits from that query.
Why not embed an I'm Feeling Lucky link in the iframe?
Halfway during the project, I realized that this functionality is pretty similar to the I'm Feeling Lucky functionality that Google still offers (for some reason?).I figured that this way, I would eliminate the need to use the API (which, btw, has a 100 queries a day limit) but instead use an I'm Feeling Lucky url (like http://www.google.com/search?&btnI=745&q=obfuscation) for the source of the iframe.
But after I tried a couple of queries like this, I realized that sometimes, an I'm Feeling Lucky url redirects to an actual Google Search page and since Google prevents their site to be rendered in an <iframe>, I was getting a lot of blank pages in the <iframe>...and that sucks.
What about the 100 query limit?
For the free offering of the Google Custom Search API, Google enforces a 100 queries per day (per project) limit.To work around this, I created five projects (i.e. 5 API keys) and whenever someone loads the page, I serve one of the five keys at random. If it turns out that that particular key is used up, the client requests another API key.
You can also specify your own API key (make sure your that the the Custom Search API service is turned on) using the key query string, as follows:
http://dreasgrech.com/upload/webroulette/?key=AIzaSyCCv2V9wF1cO1uck19H5uuAodJ-Ml0rBgg
Posted by
Andreas Grech
at
10:37 AM
Webroulette: Take me somewhere random!
2012-09-23T10:37:00+02:00
Andreas Grech
Javascript|jQuery|Projects|
Comments
Labels:
Javascript,
jQuery,
Projects
Thursday, January 26, 2012
Promoting your Chrome extension with a yellow infobar
This is a jQuery plugin I wrote which emulates Chrome's infobar for promoting a Google Chrome extension.
The following are Chrome's infobar and the one I wrote for the plugin, respectively:
Until the jQuery plugins page is restored, you're gonna have to download this plugin directly from github.
The plugin can be found at the jQuery plugins site: http://plugins.jquery.com/extinfobar/
You can get the full source of the plugin from https://github.com/dreasgrech/ChromeExtInfoBar
These are all the images that you need:
You can also specify a custom message to be displayed on the infobar, as opposed to the default message:
There are three other optional parameters you can pass; redirectIfInstallFails, rememberClose and rememberRedirect. All three default to true if unspecified.
redirectIfInstallFails specifies whether the plugin should redirect the user to the extension's Chrome Webstore page if the installation happens to fail or if the site you're using the plugin on is not verified (more info on that below).
When the user clicks on the close button, the action is remembered via localStorage so that the bar is not displayed again for him but the rememberClose parameter allows you to override this functionality; so if you set it to false, the bar will keep appearing on subsequent page visits even if the user closed it.
The last parameter, rememberRedirect, is used to save the action of the plugin redirecting the user to the extension's Chrome Webstore; by default, the action is saved which means that once a user is redirected to the Chrome Webstore page, the bar will not be shown to him on subsequent visits to your page, but you can of course override this functionality by setting rememberRedirect to false.
When you click on the 'Install' button on the infobar, and the context meets the two aforementioned criteria, the following modal dialog will pop up:

Otherwise, the user will be redirected directly to the extension's page on the Chrome Webstore (unless the redirectIfInstallFails option is explicitly set to false).
The following are Chrome's infobar and the one I wrote for the plugin, respectively:
Demo
I've set up a small demo of the plugin here: http://www.dreasgrech.com/upload/extinfobar/.Download
The plugin can be found at the jQuery plugins site: http://plugins.jquery.com/extinfobar/
You can get the full source of the plugin from https://github.com/dreasgrech/ChromeExtInfoBar
These are all the images that you need:
Usage
The simplest way to use the plugin is to simply invoke it using just your Chrome extension ID:$.fn.extInfobar({
id: 'nbilgjjflfiiijecdjpnbganoiafneph'
});
You can also specify a custom message to be displayed on the infobar, as opposed to the default message:
$.fn.extInfobar({
id: 'nbilgjjflfiiijecdjpnbganoiafneph',
message: 'This is my custom message I want to show on the infobar'
});
There are three other optional parameters you can pass; redirectIfInstallFails, rememberClose and rememberRedirect. All three default to true if unspecified.
$.fn.extInfobar({
id: 'nbilgjjflfiiijecdjpnbganoiafneph',
message: 'This is my custom message I want to show on the infobar',
redirectIfInstallFails: false,
rememberClose: false,
rememberRedirect: false
});
redirectIfInstallFails specifies whether the plugin should redirect the user to the extension's Chrome Webstore page if the installation happens to fail or if the site you're using the plugin on is not verified (more info on that below).
When the user clicks on the close button, the action is remembered via localStorage so that the bar is not displayed again for him but the rememberClose parameter allows you to override this functionality; so if you set it to false, the bar will keep appearing on subsequent page visits even if the user closed it.
The last parameter, rememberRedirect, is used to save the action of the plugin redirecting the user to the extension's Chrome Webstore; by default, the action is saved which means that once a user is redirected to the Chrome Webstore page, the bar will not be shown to him on subsequent visits to your page, but you can of course override this functionality by setting rememberRedirect to false.
How it works
The plugin makes use of Chrome's inline installation functionality, but note that this only works if your extension's website is verified and this plugin is invoked from the same domain as the verified site.When you click on the 'Install' button on the infobar, and the context meets the two aforementioned criteria, the following modal dialog will pop up:

Otherwise, the user will be redirected directly to the extension's page on the Chrome Webstore (unless the redirectIfInstallFails option is explicitly set to false).
Posted by
Andreas Grech
at
9:29 PM
Promoting your Chrome extension with a yellow infobar
2012-01-26T21:29:00+01:00
Andreas Grech
Javascript|jQuery|Projects|
Comments
Labels:
Javascript,
jQuery,
Projects
Monday, January 9, 2012
Paste and Go - A Google Chrome extension
A functionality in browsers, specifically Google Chrome and Mozilla Firefox, which I find extremely comfortable is "Paste and Go".
This pastes in your clipboard contents in the address bar and submits it automatically at one go, which is a step less than pressing Paste and then submitting manually.
Because I like this functionality a lot, I decided to try and emulate it for input textboxes on websites with a Google Chrome extension.
And the source: https://github.com/dreasgrech/PasteAndGo
It then searches for the closest <form> to your text box with jQuery's closest function and if it finds a form, it submits it.
Note that closest only traverses up the DOM tree, so it will not find <form>s which are either below (in the tree) or adjacent (siblings) to your input text box.
If no <form> is found, another approach is taken. This time, the extension searches for the closest button to your input text box and if it finds one, it clicks it. This time though, I couldn't use jQuery's closest since, most of the time, submit buttons in <form>s are placed after the input text box. Therefore, I wrote this function to find the 'closest' button:
Once a button is found, a click event is simulated on it.
Therefore, use it at your own risk.
Here are some of the places where it worked successfully:
And here are some of the sites in which it didn't work as expected:
Where did you try it, and did it work as expected?
This pastes in your clipboard contents in the address bar and submits it automatically at one go, which is a step less than pressing Paste and then submitting manually.
Because I like this functionality a lot, I decided to try and emulate it for input textboxes on websites with a Google Chrome extension.
Download
The extension is published at https://chrome.google.com/webstore/detail/nbilgjjflfiiijecdjpnbganoiafnephAnd the source: https://github.com/dreasgrech/PasteAndGo
How it works
When invoking it (Right Click -> Paste and Go), the extension grabs reference to the input text box where you right clicked, clears its value and pastes in the contents of your clipboard.It then searches for the closest <form> to your text box with jQuery's closest function and if it finds a form, it submits it.
Note that closest only traverses up the DOM tree, so it will not find <form>s which are either below (in the tree) or adjacent (siblings) to your input text box.
If no <form> is found, another approach is taken. This time, the extension searches for the closest button to your input text box and if it finds one, it clicks it. This time though, I couldn't use jQuery's closest since, most of the time, submit buttons in <form>s are placed after the input text box. Therefore, I wrote this function to find the 'closest' button:
var getClosestButton = function (el) {
var buttons;
while ((el = el.parent()).length) {
buttons = el.find(":button, input[type=submit]"); // :button -> "input[type=button], button"
if (buttons.length) {
return buttons.eq(buttons.length - 1);
}
}
};
Once a button is found, a click event is simulated on it.
A word of caution
This extension may not always work as expected. This is because it assumes that the first <form> it finds closest (upwards only) to your input box is the correct form which needs to be submitted, or that the 'closest' button that's found near your input box is the button that needs to be clicked...and the extension may not always find the correct button or submit the correct form; although the later is very rarely an issue.Therefore, use it at your own risk.
Here are some of the places where it worked successfully:
- docs.jquery.com
- Stackoverflow
- Yahoo!
- Bing
- YouTube
- The Pirate Bay
And here are some of the sites in which it didn't work as expected:
- Grooveshark
- Gmail
- CodePlex
Posted by
Andreas Grech
at
8:31 PM
Paste and Go - A Google Chrome extension
2012-01-09T20:31:00+01:00
Andreas Grech
Google Chrome Extensions|Javascript|Projects|
Comments
Labels:
Google Chrome Extensions,
Javascript,
Projects
Wednesday, November 30, 2011
Conway's Game of Life in XNA
The following video demonstrates an implementation of Conway's Game of Life I once wrote in in XNA.
Unfortunately, I currently don't have the source code for this online but I'll post it once I stop procrastinating.
Sunday, September 11, 2011
Generating a list of links for a user's YouTube uploads
This is a very simple application I just wrote to generate a list of all of the video upload links given a YouTube user.
Download the exe (release) file from: http://dreasgrech.com/upload/youtubeuseruploads/YouTubeUserUploads.exe
And the source: http://dreasgrech.com/upload/youtubeuseruploads/YouTubeUserUploads-source.zip
It won't be the best code you'll ever see, but it does the job for the task at hand.
YouTubeUserUploads.exe <username> [file]
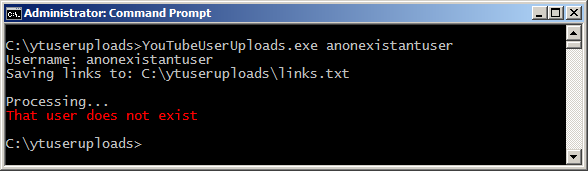
If [file] is not given, a file links.txt will be created in the current directory.
That would create (or overwrite) a text file called links.txt and write the links to my three currently uploaded videos at the time of writing:


Download
Since this was such a small project, I didn't see fit to have a github repository for it so I just uploaded it to my hosting server.Download the exe (release) file from: http://dreasgrech.com/upload/youtubeuseruploads/YouTubeUserUploads.exe
And the source: http://dreasgrech.com/upload/youtubeuseruploads/YouTubeUserUploads-source.zip
It won't be the best code you'll ever see, but it does the job for the task at hand.
Usage
If [file] is not given, a file links.txt will be created in the current directory.
Demo
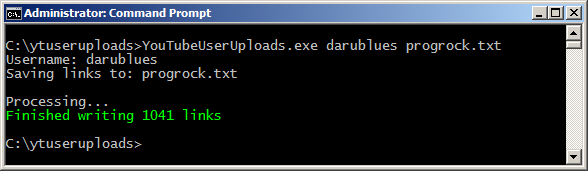
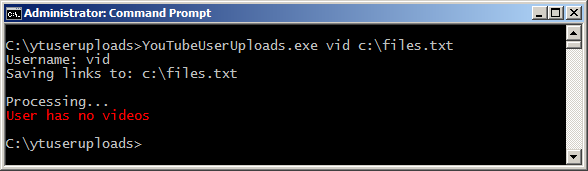
Here's an example run using my YouTube username:C:\YouTubeUserUploads.exe agnt666 uploads.txt Username: agnt666 Saving links to: uploads.txt Processing... Finished writing 3 links
That would create (or overwrite) a text file called links.txt and write the links to my three currently uploaded videos at the time of writing:
http://www.youtube.com/watch?v=rsXnEpWyeEg http://www.youtube.com/watch?v=sxBiD7u7nx8 http://www.youtube.com/watch?v=Ri2SHGZaSqs
Screenshots


Thursday, September 8, 2011
The Monty Hall game
After my last post on simulating the Monty Hall problem, I decided to go a step further and actually write the game itself. Since I wrote the simulation using JavaScript, I kept at it by writing the game using JavaScript by making use of the canvas element.
You can play the game here and find the source on Github: https://github.com/dreasgrech/The-Monty-Hall-Game.
The code leaves much to be desired but since this was a quick weekend project (...although some tweaks did spill over to the rest of the week), I didn't worry too much about it.
You can play the game here and find the source on Github: https://github.com/dreasgrech/The-Monty-Hall-Game.
The code leaves much to be desired but since this was a quick weekend project (...although some tweaks did spill over to the rest of the week), I didn't worry too much about it.
Screenshots
Posted by
Andreas Grech
at
5:26 PM
The Monty Hall game
2011-09-08T17:26:00+02:00
Andreas Grech
Game Development|Javascript|Projects|
Comments
Labels:
Game Development,
Javascript,
Projects
Friday, August 26, 2011
Balls to the Canvas!
To play around a bit with the canvas element, I decided to write this:
You can increase or decrease the number of balls on screen using the UP and DOWN arrows respectively.
View it in action
The source is here: https://github.com/dreasgrech/balls
The initial value of the hue is randomly chosen at the beginning.
Since collision detection is only applied once the balls hit the edges of the browser window and the edges are axes aligned, I'm simply inverting the part of the velocity's depending to which edge is hit.
If the ball hits either the left or right edge, the x is inverted and if the ball hits the top or bottom edge, the y is inverted.
You can increase or decrease the number of balls on screen using the UP and DOWN arrows respectively.
The source is here: https://github.com/dreasgrech/balls
Some implementation details
The background
To implement the colorful background, I'm using a cylindrical-coordinate representation of the RGB color model, known as HSV (Hue Saturation Value). Keeping the saturation and value to a constant 100 (max), I'm iterating through values 0-360 for the hue thus achieving the blending of colors. When the hue reaches 360, I reset it back to 0 and the cycle starts over.The initial value of the hue is randomly chosen at the beginning.
Balls
All of the balls' attributes are randomly generated i.e. the initial position, size, color, speed and angle.Since collision detection is only applied once the balls hit the edges of the browser window and the edges are axes aligned, I'm simply inverting the part of the velocity's depending to which edge is hit.
If the ball hits either the left or right edge, the x is inverted and if the ball hits the top or bottom edge, the y is inverted.
Resizing the window
I'm hooking to window.onresize so that once the browser window is resized, I adjust the width of the canvas appropriately and also remove the balls that are now out of screen.
Posted by
Andreas Grech
at
7:56 PM
Balls to the Canvas!
2011-08-26T19:56:00+02:00
Andreas Grech
Javascript|Projects|
Comments
Labels:
Javascript,
Projects
Sunday, February 13, 2011
StringEvolver: Evolving strings with a genetic algorithm
This is my first attempt at experimenting with a genetic algorithm. The following is an application that evolves a string given a destination to converge to.
Here is an example run:
A value between 0-1
The mutation rate determines the probability of how often a selected chromosome mutates. Mutation is very important in a genetic algorithm because it helps in keeping diversity in the population, thus avoid local minima which can slow or even halt further evolution.
The application currently uses a mutation operator called Single Point Mutation. For our current application, it works by randomly selecting a point in the string and switching the character at that point to another random character.
As an example, say the chromosome to be mutated currently contains the string "aBcdE". The single point mutation operator then randomly chooses position 2 (0-based) and replaces the character 'c' with the randomly chosen character 'W'.
This way, the chromosome "aBcdE" has now been mutated to "aBWdE".
-s, --crossover=VALUE
A value between 0-1
The crossover rate determines how often two selected chromosomes are sexually combined to produce two separate offspring.
For this application, there are two available crossover operations: One Point Crossover and Two Point Crossover. These operators are discussed further in the ctype argument.
-e, --elitism=VALUE
A value between 0-1
The elitism rate determines the number of the fittest solutions that are directly (untouched) transferred to the advancing population.
Elitism can help in preventing the potential loss of possibly good solutions and can lead to quicker convergence.
-c, --crcount=VALUE
A value greater than 1
The chromosome count determines the number of chromosomes that each population will have. The greater the number of chromosomes, the more time a population takes to advance to the next.
--fitness=VALUE
VALUE = sum, levenshtein or hamming
The fitness calculator determines which algorithm is used to calculate how fit a given chromosome is.
There are currently three fitness calculators to choose from:
Sum
The sum calculator calculates the ASCII difference between each character of the target strings.
The Levenshtein distance between two strings is the minimum number of edits needed to transform one string into the other. The transformation can include insertion, deletion and substitution. This distance is also referred to as the edit distance.
The Hamming distance between two strings of equal length is the number of positions at which the corresponding symbols are different. The reason Hamming distance requires the strings to be of equal length is because unlike the Levenshtein distance, the Hamming distance only allows substitutions.
As an example, the Hamming distance between "janica" and "jenixo" is 3.
--ctype=VALUE
VALUE = one or two
The crossover type determines which crossover operator is to be used when sexually combining two chromosomes.
There are currently two available methods to choose from:
One
The One-Point Crossover method chooses a random point (called a locus) in the string and all the data beyond that point in either chromosome is swapped between the parent chromosomes. The resulting two chromosomes are the children.
Two
The Two-Point Crossover method is very similar to the One-Point Crossover method but this one chooses two random points along the string rather than one. The data between the two points is swapped and the resulting chromosomes are the children.
-t, --truncate=VALUE
0 < VALUE <= 1
The Truncation value determines how many chromosomes of the current population should be kept and used for the selection, crossover and mutation operations. Note that before the truncation is performed, the chromosomes in the population are sorted in descending order by their fitness, so the fittest chromosomes are kept after the truncation.
A value of 1 uses all of the chromosomes and a value of 0.5 uses half of the population (the better half, of course)
Here is an example run:
> StringEvolver -m 0.25 -s 0.6 -c 2000 -e 0.1 --fitness=hamming --ctype=one -t 0.3 "Charles Darwin was right!"
Evolution Destination: Charles Darwin was right!
Mutation Rate: 25%
Crossover Rate: 60%
Truncation Rate: 30%
Chromosomes / population: 2000
Elitism / population: 200 (0.1%)
Fitness Calculator: Hamming Distance
Crossover Type: One Point
1: L<eI`Y@ D#raF'JKJ7DUAg"GR
2: L<eI`Y@ D#raF'JKJ7DUAg"GR
3: chNOLe"5]={Iiyrgk*,rEpE/!
4: L<eI`Y@ D#ra nR$C1SrYqha+
5: L<eI`Y@ D#ra nR$C1SrYqha+
6: lpa5`Y@ D#ra nR$C8y.iqrt5
7: C]Y&hJ1 %aRwi< aaB,r_Zh68
8: 1s[r.ts %aGwi< _a"=rjXyN!
9: chNOlFsyD#rwi< }aB,r_Zh68
10: chNO9e" D#rwi< }aB=rPgh6!
11: chNO9e" D#rwi< }aB=rPgh6!
12: 1s[r.Ks D#ra n}way rAght!
13: C}hplFs D#rwi.}way rPgh6!
14: C'aclos Da{]inrwas r.ghx!
15: C'aclos Da{]inrwas r.ghx!
16: ChNrlFs Da>win}was `gha!
17: ChNrlFs Da>winlwas r;gh6!
18: Ch[rlFs Da>wi< was rAght!
19: Chacle@ D#rwin was rjght!
20: Chacle@ D#rwin was rjght!
21: ChNrles Darwin}was rAght!
22: ChNrles Darwin}was rAght!
23: Charles Darwin}was r`ght!
24: Charles Darwin}was r`ght!
25: Charles Darwin was rAght!
26: Charles Darwin was rAght!
27: Charles Darwin was rAght!
28: Charles Darwin was rAght!
29: Charles Darwin was rAght!
30: Charles Darwin was right!
Found in 30 generations
Time Taken: 00:00:00.4730271
Source
You can download the source from github: https://github.com/dreasgrech/StringEvolverCommand Line arguments
-m, --mutation=VALUEA value between 0-1
The mutation rate determines the probability of how often a selected chromosome mutates. Mutation is very important in a genetic algorithm because it helps in keeping diversity in the population, thus avoid local minima which can slow or even halt further evolution.
The application currently uses a mutation operator called Single Point Mutation. For our current application, it works by randomly selecting a point in the string and switching the character at that point to another random character.
As an example, say the chromosome to be mutated currently contains the string "aBcdE". The single point mutation operator then randomly chooses position 2 (0-based) and replaces the character 'c' with the randomly chosen character 'W'.
This way, the chromosome "aBcdE" has now been mutated to "aBWdE".
-s, --crossover=VALUE
A value between 0-1
The crossover rate determines how often two selected chromosomes are sexually combined to produce two separate offspring.
For this application, there are two available crossover operations: One Point Crossover and Two Point Crossover. These operators are discussed further in the ctype argument.
-e, --elitism=VALUE
A value between 0-1
The elitism rate determines the number of the fittest solutions that are directly (untouched) transferred to the advancing population.
Elitism can help in preventing the potential loss of possibly good solutions and can lead to quicker convergence.
-c, --crcount=VALUE
A value greater than 1
The chromosome count determines the number of chromosomes that each population will have. The greater the number of chromosomes, the more time a population takes to advance to the next.
--fitness=VALUE
VALUE = sum, levenshtein or hamming
The fitness calculator determines which algorithm is used to calculate how fit a given chromosome is.
There are currently three fitness calculators to choose from:
Sum
The sum calculator calculates the ASCII difference between each character of the target strings.
public override double CalculateFitness(Chromosome ch)
{
var distanceToTarget = Target.Select((t, i) => Math.Abs(t - ch.Value[i])).Sum();
return 1.0 / distanceToTarget;
}
Levenshtein DistanceThe Levenshtein distance between two strings is the minimum number of edits needed to transform one string into the other. The transformation can include insertion, deletion and substitution. This distance is also referred to as the edit distance.
public override double CalculateFitness(Chromosome ch)
{
return 1.0 / LevenshteinDistance(ch.Value, Target);
}
Hamming DistanceThe Hamming distance between two strings of equal length is the number of positions at which the corresponding symbols are different. The reason Hamming distance requires the strings to be of equal length is because unlike the Levenshtein distance, the Hamming distance only allows substitutions.
As an example, the Hamming distance between "janica" and "jenixo" is 3.
public override double CalculateFitness(Chromosome ch)
{
if (ch.Value.Length != Target.Length)
{
return 1.0 / double.PositiveInfinity;
}
var difference = 0;
for (int i = 0; i < Target.Length; i++)
{
if (ch.Value[i] != Target[i])
{
difference++;
}
}
return 1.0 / difference;
}
--ctype=VALUE
VALUE = one or two
The crossover type determines which crossover operator is to be used when sexually combining two chromosomes.
There are currently two available methods to choose from:
One
The One-Point Crossover method chooses a random point (called a locus) in the string and all the data beyond that point in either chromosome is swapped between the parent chromosomes. The resulting two chromosomes are the children.
public Tuple<Chromosome, Chromosome> Crossover(Chromosome c1, Chromosome c2)
{
var locus = random.Next(0, c1.Value.Length + 1);
string ch1 = c1.Value.Substring(0, locus) + c2.Value.Substring(locus),
ch2 = c2.Value.Substring(0, locus) + c1.Value.Substring(locus);
return new Tuple<Chromosome, Chromosome>(new Chromosome(ch1, fitnessCalculator), new Chromosome(ch2, fitnessCalculator));
}
Two
The Two-Point Crossover method is very similar to the One-Point Crossover method but this one chooses two random points along the string rather than one. The data between the two points is swapped and the resulting chromosomes are the children.
public Tuple<Chromosome, Chromosome> Crossover(Chromosome c1, Chromosome c2)
{
int locus1 = random.Next(0, c1.Value.Length),
locus2 = random.Next(locus1, c1.Value.Length),
distance = locus2 - locus1;
string ch1 = c1.Value.Substring(0, locus1) + c2.Value.Substring(locus1, distance) + c1.Value.Substring(locus2),
ch2 = c2.Value.Substring(0, locus1) + c1.Value.Substring(locus1, distance) + c2.Value.Substring(locus2);
return new Tuple<Chromosome, Chromosome>(new Chromosome(ch1, fitnessCalculator), new Chromosome(ch2, fitnessCalculator));
}
-t, --truncate=VALUE
0 < VALUE <= 1
The Truncation value determines how many chromosomes of the current population should be kept and used for the selection, crossover and mutation operations. Note that before the truncation is performed, the chromosomes in the population are sorted in descending order by their fitness, so the fittest chromosomes are kept after the truncation.
A value of 1 uses all of the chromosomes and a value of 0.5 uses half of the population (the better half, of course)
Posted by
Andreas Grech
at
8:14 PM
StringEvolver: Evolving strings with a genetic algorithm
2011-02-13T20:14:00+01:00
Andreas Grech
C#|Genetic Algorithms|Projects|
Comments
Labels:
C#,
Genetic Algorithms,
Projects
Thursday, December 23, 2010
The A* algorithm in XNA
The A* search algorithm ("A star") is used for path finding and graph traversal. The following is my implementation in XNA.
The A* algorithm itself is very similar to Dijkstra's algorithm but the A* uses heuristics to achieve better performance.
CTRL + Left Mouse Click - Set the source
ALT + Left Mouse Click - Set the destination
Space - Toggle grid lines
Enter - Start pathfinding!
` - Open the developer console
The A* algorithm itself is very similar to Dijkstra's algorithm but the A* uses heuristics to achieve better performance.
Screenshots
Usage
Left Mouse Click - Create a barrierCTRL + Left Mouse Click - Set the source
ALT + Left Mouse Click - Set the destination
Space - Toggle grid lines
Enter - Start pathfinding!
` - Open the developer console
Heuristics
The A* algorithm uses a heuristic to improve performance by trying to "guess" the best path, although this will not, unlike Dijkstra's which does not use a heuristic, guarantee the shortest path.Diagonal Distance
public int GetEstimate(Point source, Point destination)
{
return Math.Max(Math.Abs(destination.X - source.X), Math.Abs(destination.Y - source.Y));
}
Manhattan Distance
public int GetEstimate(Point source, Point destination)
{
return Math.Abs(destination.X - source.X) + Math.Abs(destination.Y - source.Y);
}
Euclidean Distance
public int GetEstimate(Point source, Point destination)
{
return (int)Math.Sqrt(Math.Pow(source.X - destination.X,2) + Math.Pow(source.Y - destination.Y,2));
}
Dijkstra
When the heuristic is 0, the A* algorithm turns into Dijkstra's algorithmpublic int GetEstimate(Point source, Point destination)
{
return 0;
}
Try it!
The source can be found on github: https://github.com/dreasgrech/AStarXNAMonday, August 23, 2010
A Developer Game Console plugin for XNA Games
This is a project I was recently working on and it's a developer console for XNA games. It can easily be added to any XNA game and modified
By default, the console is opened with the ` (OemTilde key) but this, amongst other settings, can be changed via the Options property.
You can then add commands and customize the console.
The compiled dll of XNAGameConsole can also be downloaded from here: http://code.google.com/p/xnagameconsole/downloads/list
The console supports pasting via CTRL+V but this requires the game to be running in a Single Threaded Apartment.
To do this, add the STAThread attribute to the entry point of your game:
There are currently 2 ways how to add custom commands to the console:
1. Using IConsoleCommand
Console commands can be built via the IConsoleCommand interface.
The following is an example of a command:
Such a command can then be added to the console like such:
2. Via a Func<string, string>
Commands can also be added without using IConsoleCommand, like the following:
You can dynamically write to the console via the WriteLine method:
The console can be customized with a number of options. These options can be accessed through the GameConsoleOptions class.
To set the initial options, instantiate a new GameConsoleOptions class, set your desired options and pass it through one of the GameConsole's overloaded constructors:
The options can also be changed dynamically through the Options property of GameConsole:
The following are the current available options:
ToggleKey (Microsoft.Xna.Framework.Input.Keys)
Gets or sets the key that is used to show / hide the console
Default: Keys.OemTilde
BackgroundColor (Microsoft.Xna.Framework.Graphics.Color)
Gets or sets the color for the background of the console
Default: new Color(0, 0, 0, 125)
FontColor (Microsoft.Xna.Framework.Graphics.Color)
Sets the same specified color for all of the following properties:
Default: Color.White
BufferColor (Microsoft.Xna.Framework.Graphics.Color)
Gets or sets the color of the text in the buffer
Default: Color.White
PastCommandColor (Microsoft.Xna.Framework.Graphics.Color)
Gets or sets the color of the past commands
Default: Color.White
PastCommandOutputColor (Microsoft.Xna.Framework.Graphics.Color)
Gets or sets the color of the past command outputs
Default: Color.White
PromptColor (Microsoft.Xna.Framework.Graphics.Color)
Gets or sets the color of the prompt
Default: Color.White
CursorColor (Microsoft.Xna.Framework.Graphics.Color)
Gets or sets the color of the cursor
Default: Color.White
AnimationSpeed (float)
Gets or sets the speed by which the console opens/closes
Default: 1
CursorBlinkSpeed (float)
Gets or sets the speed by which the cursor blinks
Default: 0.5f
Height (int)
Gets or sets the height of the console, in pixels
Default: 300
Prompt (string)
Gets or sets the prompt
Default: $
Cursor (char)
Gets or sets the cursor display character
Default: _
Padding (int)
Gets or sets the padding, in pixels, between the border of the console and the inner text
Default: 30
Margin (int)
Gets or sets the margin, in pixels, between the left and right side of the screen to the console border
Default: 30
OpenOnWrite (bool)
Gets or sets a boolean value that indicates whether to open the console, if it's closed, when writing to the console
Default: true
Font (Microsoft.Xna.Framework.Graphics.SpriteFont)
Gets or sets the font that is used in the console
Default: Consolas, Regular, 11pt
Screenshots
Quick Start
Add the compiled XnaGameConsole dll as a reference and initialize the GameConsole:GameConsole console = new GameConsole(this, spriteBatch); // where `this` is your `Game` class
By default, the console is opened with the ` (OemTilde key) but this, amongst other settings, can be changed via the Options property.
You can then add commands and customize the console.
Features
- Add your own commands
- Customizable Options
- Clipboard Support
- External Writing
- Command Auto-Complete
- Command History
Source and Downloads
You can checkout a copy of the source at the Google Code page: http://code.google.com/p/xnagameconsole/The compiled dll of XNAGameConsole can also be downloaded from here: http://code.google.com/p/xnagameconsole/downloads/list
Notes
Clipboard Support
The console supports pasting via CTRL+V but this requires the game to be running in a Single Threaded Apartment.
To do this, add the STAThread attribute to the entry point of your game:
static class Program
{
/// <summary>
/// The main entry point for the application.
/// </summary>
[STAThread]
static void Main(string[] args)
{
using (Game1 game = new Game1())
{
game.Run();
}
}
}
Adding Commands
There are currently 2 ways how to add custom commands to the console:
1. Using IConsoleCommand
Console commands can be built via the IConsoleCommand interface.
The following is an example of a command:
class MovePlayerCommand:IConsoleCommand
{
public string Name
{
get { return "move"; }
}
public string Description
{
get { return "Moves the player"; }
}
private Player player;
public MovePlayerCommand(Player player)
{
this.player = player;
}
public string Execute(string[] arguments)
{
var newPosition = new Vector2(float.Parse(arguments[0]), float.Parse(arguments[1]));
player.Position = newPosition;
return "Moved player to " + newPosition;
}
}
Such a command can then be added to the console like such:
console.AddCommand(new MovePlayerCommand(player));
2. Via a Func<string, string>
Commands can also be added without using IConsoleCommand, like the following:
console.AddCommand("rotRad", a =>
{
var angle = float.Parse(a[0]);
player.Angle = angle;
return String.Format("Rotated the player to {0} radians", angle);
}, "Rotates the player");
The advantage of adding a command like this is that in the Func<> you have access to the variables outside the closure.Writing to the Console
You can dynamically write to the console via the WriteLine method:
console.WriteLine("Writing from the code");
Console Options
The console can be customized with a number of options. These options can be accessed through the GameConsoleOptions class.
To set the initial options, instantiate a new GameConsoleOptions class, set your desired options and pass it through one of the GameConsole's overloaded constructors:
GameConsoleOptions options = new GameConsoleOptions { FontColor = Color.Crimson, Prompt = ">", BackgroundColor = Color.DarkGreen };
GameConsole console = new GameConsole(this, spriteBatch, options);
The options can also be changed dynamically through the Options property of GameConsole:
console.Options.Height = 200;
The following are the current available options:
ToggleKey (Microsoft.Xna.Framework.Input.Keys)
Gets or sets the key that is used to show / hide the console
Default: Keys.OemTilde
BackgroundColor (Microsoft.Xna.Framework.Graphics.Color)
Gets or sets the color for the background of the console
Default: new Color(0, 0, 0, 125)
FontColor (Microsoft.Xna.Framework.Graphics.Color)
Sets the same specified color for all of the following properties:
- BufferColor
- PastCommandColor
- PastCommandOutputColor
- PromptColor
- CursorColor
Default: Color.White
BufferColor (Microsoft.Xna.Framework.Graphics.Color)
Gets or sets the color of the text in the buffer
Default: Color.White
PastCommandColor (Microsoft.Xna.Framework.Graphics.Color)
Gets or sets the color of the past commands
Default: Color.White
PastCommandOutputColor (Microsoft.Xna.Framework.Graphics.Color)
Gets or sets the color of the past command outputs
Default: Color.White
PromptColor (Microsoft.Xna.Framework.Graphics.Color)
Gets or sets the color of the prompt
Default: Color.White
CursorColor (Microsoft.Xna.Framework.Graphics.Color)
Gets or sets the color of the cursor
Default: Color.White
AnimationSpeed (float)
Gets or sets the speed by which the console opens/closes
Default: 1
CursorBlinkSpeed (float)
Gets or sets the speed by which the cursor blinks
Default: 0.5f
Height (int)
Gets or sets the height of the console, in pixels
Default: 300
Prompt (string)
Gets or sets the prompt
Default: $
Cursor (char)
Gets or sets the cursor display character
Default: _
Padding (int)
Gets or sets the padding, in pixels, between the border of the console and the inner text
Default: 30
Margin (int)
Gets or sets the margin, in pixels, between the left and right side of the screen to the console border
Default: 30
OpenOnWrite (bool)
Gets or sets a boolean value that indicates whether to open the console, if it's closed, when writing to the console
Default: true
Font (Microsoft.Xna.Framework.Graphics.SpriteFont)
Gets or sets the font that is used in the console
Default: Consolas, Regular, 11pt
Posted by
Andreas Grech
at
6:13 PM
A Developer Game Console plugin for XNA Games
2010-08-23T18:13:00+02:00
Andreas Grech
Game Development|Projects|XNA|
Comments
Labels:
Game Development,
Projects,
XNA
Friday, August 6, 2010
The Lost Battle - a ruby multiplayer game with Gosu and Chipmunk
This is a game I recently built to learn ruby in conjunction with the Gosu game engine and the Chipmunk physics engine.
You can checkout using Mercurial with: hg clone https://the-lost-battle.googlecode.com/hg/ the-lost-battle
Or ruby1.9 main.rb if you have multiple versions of ruby installed.
After you click start game on the main screen, you will see the player selection, similar to the second screenshot above. If you do not have any joysticks connected, you will only be shown 1 player slot and the game will be unable to start since it requires 1 < players <= 4. Therefore, with a single joystick connected, you will be able to play a 2 player game...one player with the keyboard+mouse and the other player with the controller. Make sure that the joysticks are connected before you go into the player selection screen because the amount of player slots that the screen will display depends on the number of connected controllers.
If you want to use a different controller, you need to add a new configuration in the gamestate.rb file, similar to the PS3 one:
To find the correct button-mappings, use jstest.
Screenshots
Source
The source of the game can be found at it's google code page here: http://code.google.com/p/the-lost-battle/You can checkout using Mercurial with: hg clone https://the-lost-battle.googlecode.com/hg/ the-lost-battle
Prerequisites
For the game to run, it requires the following:Running the game
To launch the game, fire up your terminal, navigate to the game's directory and run main.rb with the ruby interpreter: ruby main.rbOr ruby1.9 main.rb if you have multiple versions of ruby installed.
After you click start game on the main screen, you will see the player selection, similar to the second screenshot above. If you do not have any joysticks connected, you will only be shown 1 player slot and the game will be unable to start since it requires 1 < players <= 4. Therefore, with a single joystick connected, you will be able to play a 2 player game...one player with the keyboard+mouse and the other player with the controller. Make sure that the joysticks are connected before you go into the player selection screen because the amount of player slots that the screen will display depends on the number of connected controllers.
Additional Notes
Joystick support
The game requires at least one joystick to be connected. Since I had very limited time in building this game, I only pre-set configuration for PS3 controllers. You can try and play it with other controllers but it's unlikely that the usable buttons will be comfortable to use, and the axis may not even be configured correctly.If you want to use a different controller, you need to add a new configuration in the gamestate.rb file, similar to the PS3 one:
PS3_CONTROLLER = GamepadConfig.new({horizontal: 0, vertical: 1}, {:horizontal => 2, :vertical => 3}, 11, 9)
Then use your new configuration instead of PS3_CONTROLLER when adding a new player to the player list:@player_list.add(p.name, rand(window.width), rand(window.height), p.controller_type == :joystick ? GamePad.new(p.joystick_path, PS3_CONTROLLER) : Mouse.new(window), p.vehicle, p.crosshair)
To find the correct button-mappings, use jstest.
Further info
I now plan to make other individual posts explaining some of the stuff I did, like Gosu Joystick support on linux, Health Bars with RMagick, Parallax scrolling, the Menu system and others.Wednesday, July 28, 2010
Typocalypse - A typing game in XNA
Just a couple of weeks ago, Marc Tanti and I decided to check out Microsoft's XNA and what better way to do it than building a game in about 24 hours of sleepless coding and caffeine intake ?
At the Google Code page, there is both the source and an executable installation file (compiled with WiX XNA Installer)
You can checkout with: hg clone https://typocalypse.googlecode.com/hg/ typocalypse
Screenshots
Source
You can view the source here: http://code.google.com/p/typocalypse/At the Google Code page, there is both the source and an executable installation file (compiled with WiX XNA Installer)
You can checkout with: hg clone https://typocalypse.googlecode.com/hg/ typocalypse
Some notes...
Audio
The in-game music is the theme from the Amiga game The Great Giana Sisters, overlayed with some sound effects recorded by Marc Tanti. All of the other sound effects in the game where also recorded by Marc Tanti.Text Input in XNA
Since XNA does not provide native support for text input, I used global hooks with these set of classes developed by George Mamaladze to capture keystrokes.Prefix Matching
Prefix matching was done via a Trie and this is described in more detail at Marc Tanti's post.
Posted by
Andreas Grech
at
11:23 AM
Typocalypse - A typing game in XNA
2010-07-28T11:23:00+02:00
Andreas Grech
Game Development|Projects|XNA|
Comments
Labels:
Game Development,
Projects,
XNA
Thursday, May 6, 2010
Translating brainfuck code to ANSI-C code with BrainfuckToC
This is my latest project. An application that translates brainfuck code to ANSI-C code.
To download the sources, visit the Google Code brainfucktoc page.
I would also like to thank Reuben Sammut who is a contributer to the project.
Example:
This will take a brainfuck source file and output its equivalent C code.
If you want to redirect the output to a text file, run bftoc as follows:
To download the sources, visit the Google Code brainfucktoc page.
I would also like to thank Reuben Sammut who is a contributer to the project.
Usage
bftoc <source file>
Example:
bftoc bfcode.b
This will take a brainfuck source file and output its equivalent C code.
If you want to redirect the output to a text file, run bftoc as follows:
bftoc bfcode.b > bfcode.c
Examples
Hello World
Input:++++++++++[>+++++++>++++++++++>+++>+<<<<-]>++.>+.+++++++..+++.>++.<<+++++++++++++++.>.+++.------.--------.>+.>.Output:
#include <stdio.h>
#include <stdlib.h>
int main () {
char *ptr = calloc(10000, sizeof *ptr), *start = ptr;
int i = 0;
*ptr += 10;
while (*ptr) {
++ptr;
*ptr += 7;
++ptr;
*ptr += 10;
++ptr;
*ptr += 3;
++ptr;
++*ptr;
ptr -= 4;
--*ptr;
}
++ptr;
*ptr += 2;
putchar(*ptr);
++ptr;
++*ptr;
putchar(*ptr);
*ptr += 7;
putchar(*ptr);
putchar(*ptr);
*ptr += 3;
putchar(*ptr);
++ptr;
*ptr += 2;
putchar(*ptr);
ptr -= 2;
*ptr += 15;
putchar(*ptr);
++ptr;
putchar(*ptr);
*ptr += 3;
putchar(*ptr);
*ptr -= 6;
putchar(*ptr);
*ptr -= 8;
putchar(*ptr);
++ptr;
++*ptr;
putchar(*ptr);
++ptr;
putchar(*ptr);
free(start);
return 0;
}
Tuesday, December 22, 2009
jsLaTeX: A jQuery plugin to directly embed LaTeX into your website or blog
jsLaTeX is the latest plugin I developed for jQuery and I wrote it so that I could easily be able to embed LaTeX directly into my blog but anyone can use it for their site.
You can download the normal, unpacked version for development or the packed version for production.
Click here to view a demo
Here is a link to the jQuery plugin page, where you can find all the releases.
Usage Instructions
1. Download the jquery.jslatex.js file from one of the above-mentioned links and add it to your page along with jQuery (if it is not already added):
<script src="http://ajax.googleapis.com/ajax/libs/jquery/1.3.2/jquery.min.js"></script> <script src="jquery.jslatex.js"></script>
2. The simplest way to invoke the script is by calling the plugin with no parameters:
<script>
$(function () {
$(".latex").latex();
});
</script>
<div class="latex">
\int_{0}^{\pi}\frac{x^{4}\left(1-x\right)^{4}}{1+x^{2}}dx =\frac{22}{7}-\pi
</div>
The above will render the following:
\int_{0}^{\pi}\frac{x^{4}\left(1-x\right)^{4}}{1+x^{2}}dx =\frac{22}{7}-\pi
The plugin works by taking the inner HTML of the specified container obviously assuming that it is valid LaTeX, and displays the image using CodeCogs LaTeX engine. The rendered output replaces the equation inside the container.
The plugin also accepts 3 optional parameters:
- format
- url
- callback
[format]
The format parameter is used to specify the format of the returned output. There are currently 3 supported formats:
- gif
- png
- swf
[url]
The url parameter is used to change the engine of the LaTeX generator. Let's take an example with a different engine, and in this case I will be using SITMO's LaTeX engine.
The url SITMO's engine uses to render the output is as follows:
where equation is the the LaTeX equation you wish to render.
Now we must tell the plugin where to put the equation and we do this by using the {e} specifier. This is how it can be used:
$(".latex").latex({url: 'http://www.sitmo.com/gg/latex/latex2png.2.php?z=100&eq={e}'});
As you can see from the above example, we placed the {e} specifier where the equation should be and then the engine takes care of the rest.
Here is an example of using the new engine to render the output:
\int_{0}^{\pi}\frac{x^{4}\left(1-x\right)^{4}}{1+x^{2}}dx =\frac{22}{7}-\pi
The plugin currently supports another specifier: {f} and this is used for those engines that allow you to specify a file-format output. The file-types that are currently supported are the ones mentioned in the [format] section.
If we take the 'original' engine url, we can turn into a url with specifiers like such:
Here are examples of Engines you can use (ready with specifiers):
| Engines |
|---|
| http://latex.codecogs.com/{f}.latex?{e} |
| http://www.sitmo.com/gg/latex/latex2png.2.php?z=100&eq={e} |
| http://www.forkosh.dreamhost.com/mathtex.cgi?{e} |
| http://chart.apis.google.com/chart?cht=tx&chl={e} |
[callback]
The callback parameter allows you to pass a function that will be executed after the image has been retrieved. In your callback function, this will refer to the newly created element (as a jQuery object) that contains the rendered output.
The following example will set a border around your rendered output.

$(".latex").latex({
callback : function() {
this.css({ border: '1px solid black'});
}
});
With the above callback, we can now render the following:
\int_{0}^{\pi}\frac{x^{4}\left(1-x\right)^{4}}{1+x^{2}}dx =\frac{22}{7}-\pi
Sunday, December 20, 2009
Centering a container on screen with JavaScript (jQuery plugin)
Recently I needed a way to center an image on screen for a 'Coming Soon' kind of page, and so I wrote this jQuery plugin that does in fact this.
You can download the normal, unpacked version for development or the packed version for production.
Click here to view a demo
The container needs to have a preset width and height for this to work
Here is the unpacked code:
You can download the normal, unpacked version for development or the packed version for production.
Click here to view a demo
The container needs to have a preset width and height for this to work
Here is the unpacked code:
/*
* CenterScreen v1.1 - jQuery plugin
*
* Copyright (c) 2009 - 2010 Andreas Grech
*
* Dual licensed under the MIT and GPL licenses:
* http://www.opensource.org/licenses/mit-license.php
* http://www.gnu.org/licenses/gpl.html
*
* http://blog.dreasgrech.com
*/
(function ($) {
$.fn.centerScreen = function () {
return this.each(function () {
var $this = $(this),
$window = $(window),
center = function () {
var winWidth = $window.width(),
winHeight = $window.height();
$this.css({
position: 'absolute',
left: ((winWidth / 2) - ($this.outerWidth() / 2)),
top: ((winHeight / 2) - ($this.outerHeight() / 2))
});
};
$window.resize(center);
center();
});
};
}(jQuery));
Posted by
Andreas Grech
at
3:19 PM
Centering a container on screen with JavaScript (jQuery plugin)
2009-12-20T15:19:00+01:00
Andreas Grech
Javascript|jQuery|Projects|
Comments
Labels:
Javascript,
jQuery,
Projects
Subscribe to:
Posts (Atom)