Showing posts with label C#. Show all posts

Monday, July 21, 2014

A workaround for allowing multiple callbacks to Application.RegisterLogCallback

Unity only supports a single delegate to be registered with Application.RegisterLogCallback, which is unfortunate because it means that two independent plugins can't make separate use of it.

A bug was filed for this issue last year: http://feedback.unity3d.com/suggestions/change-application-dot-registerlogcallback-to-allow-multiple-callbacks

To get around this, I wrote a class to allow for multiple callbacks to be registered. Make sure let only this class make the call to Application.RegisterLogCallback.
using System.Collections.Generic;
using UnityEngine;

/// <summary>
/// Unity only handles a single delegate registered with Application.RegisterLogCallback
/// http://feedback.unity3d.com/suggestions/change-application-dot-registerlogcallback-to-allow-multiple-callbacks
/// 
/// This class is used to work around that by allowing multiple delegates to hook to the log callback.
/// </summary>
public static class LogCallbackHandler
{
    private static readonly List<Application.LogCallback> callbacks;

    static LogCallbackHandler()
    {
        callbacks = new List<Application.LogCallback>();

        Application.RegisterLogCallback(HandleLog);
    }

    /// <summary>
    /// Register a delegate to be called on log messages.
    /// </summary>
    /// <param name="logCallback"></param>
    public static void RegisterLogCallback(Application.LogCallback logCallback)
    {
        callbacks.Add(logCallback);
    }

    private static void HandleLog(string condition, string stackTrace, LogType type)
    {
        for (var i = 0; i < callbacks.Count; i++)
        {
            callbacks[i](condition, stackTrace, type);
        }
    }
}

Friday, December 13, 2013

A 2D Freeform Directional Blend Tree for locomotion in Unity 3D

This video demonstrates a root-motion driven, 2D Freeform Directional Blend Tree for locomotive states in Unity 3D.

Using such a blend tree, a character can aim and walk in different directions independently and simultaneously.


With a gamepad, I'm moving the character with the left stick and rotating with the right stick.

I am using a total of 9 animations for the blend tree. Four for each axis and the middle one for idle:
  1. Idle
  2. Forward Walk
  3. Backward Walk
  4. Left Strafe Walk
  5. Right Strafe Walk
  6. Forward Run
  7. Backward Run
  8. Left Strafe Run
  9. Right Strafe Run

Here's a closer look at the blend tree and its motions:


This locomotive blend tree exists on an Animator Layer called LowerBody which has has an Avatar Mask applied with only the legs selected (including IK). By having layers representing different sections of the body, I can combine upper-body animations with lower-body animations. In my case, the character can walk/run and aim at the same time using a single animation for AIMING (which exists on the upper-body layer).

This is the Avatar Mask I use on the Lower-Body layer on which the locomotion blend tree exists:


I am controlling the blend tree with two parameters representing a direction vector: VelX and VelZ.

This direction vector determines the locomotive state of the character i.e. which direction his legs should be moving.

  • If (VelX, VelZ) is (0, 1), the character runs forward in a straight line.
  • If (VelX, VelZ) is (-1, 0.5), the character walks forward while strafing to the left.
  • If (VelX, VelZ) is (0.5, -1), the character runs backwards while slightly strafing to the right
  • etc...

This is the gist of the code which both a) sets the (VelX, VelZ) direction vector [Left Stick] i.e. LOCOMOTION and b) rotates the model to aim [Right Stick] i.e ROTATION:

private Vector3 lastLeftStickInputAxis;  // stores the axis input from the left stick between frames

private void Update()
{
    /* START LOCOMOTION */

    // Get the axis from the left stick (a Vector2 with the left stick's direction)
    var leftStickInputAxis = inputManager.LeftAxis;
    
    // Get the angle between the the direction the model is facing and the input axis vector
    var a = SignedAngle(new Vector3(leftStickInputAxis.x, 0, leftStickInputAxis.y), model.transform.forward);
    
    // Normalize the angle
    if (a < 0)
    {
        a *= -1;
    }
    else
    {
        a = 360 - a;
    }
    
    // Take into consideration the angle of the camera
    a += Camera.main.transform.eulerAngles.y;

    var aRad = Mathf.Deg2Rad*a; // degrees to radians
    
    // If there is some form of input, calculate the new axis relative to the rotation of the model
    if (leftStickInputAxis.x != 0 || leftStickInputAxis.y != 0)
    {
        leftStickInputAxis = new Vector2(Mathf.Sin(aRad), Mathf.Cos(aRad));
    }
    
    float xVelocity = 0f, yVelocity = 0f;
    float smoothTime = 0.05f;

    // Interpolate between the input axis from the last frame and the new input axis we calculated
    leftStickInputAxis = new Vector2(Mathf.SmoothDamp(lastLeftStickInputAxis.x, leftStickInputAxis.x, ref xVelocity, smoothTime), Mathf.SmoothDamp(lastLeftStickInputAxis.y, leftStickInputAxis.y, ref yVelocity, smoothTime));
    
    // Update the Animator with our values so that the blend tree updates
    animator.SetFloat("VelX", leftStickInputAxis.x);
    animator.SetFloat("VelZ", leftStickInputAxis.y);
    
    lastLeftStickInputAxis = leftStickInputAxis;

    /* END LOCOMOTION */


    /* START ROTATION */

    // Get the axis from the right stick (a Vector2 with the right stick's direction)
    var rightStickInputAxis = inputManager.RightAxis; 
    if (rightStickInputAxis.x != 0 || rightStickInputAxis.y != 0)
    {
        float angle2 = 0;
        if (rightStickInputAxis.x != 0 || rightStickInputAxis.y != 0)
        {
            angle2 = Mathf.Atan2(rightStickInputAxis.x, rightStickInputAxis.y)*Mathf.Rad2Deg;
            if (angle2 < 0)
            {
                angle2 = 360 + angle2;
            }
        }
    
        // Calculate the new rotation for the model and apply it
        var rotationTo = Quaternion.Euler(0, angle2 + Camera.main.transform.eulerAngles.y, 0);
        model.transform.rotation = Quaternion.Slerp(model.transform.rotation, rotationTo, Time.deltaTime*10);
    }

    /* END ROTATION */
}

private float SignedAngle(Vector3 a, Vector3 b)
{
    return Vector3.Angle(a, b) * Mathf.Sign(Vector3.Cross(a, b).y);
}

The soldier model and animations are from Mixamo.

Thursday, December 12, 2013

Keeping track of cooldowns with a helper class in Unity 3D

For my current project, I wrote a simple class to keep track of my cooldowns.

So for example, my character can fire every 2 seconds, jump every 4 seconds and sprint every 3.142 seconds; and this class takes care of the cooldown timers for me.

Here's how I use it:

public class Player : MonoBehaviour 
{
    private CooldownTimer firingCooldown;
    private CooldownTimer sprintCooldown;

    private void Awake() 
    {
        firingCooldown = new CooldownTimer(2f); // the player can fire every 2 seconds
        sprintCooldown = new CooldownTimer(3.142f); // the player can sprint every 3.142 seconds
    }

    private void Update() 
    {
        if (Input.GetButtonDown("Fire") && firingCooldown.CanWeDoAction()) 
        {
            firingCooldown.UpdateActionTime();
            // Do firing logic            
        }

        if (Input.GetButtonDown("Sprint") && sprintCooldown.CanWeDoAction()) 
        {
            sprintCooldown.UpdateActionTime();
            // Do sprinting logic            
        }
    }
}

And this here's the CooldownTimer class:

using System;

public class CooldownTimer
{
    private float? LastActionDone { get; set; }
    private float IntervalSeconds { get; set; }

    public CooldownTimer(float intervalSeconds)
    {
        IntervalSeconds = intervalSeconds;
    }

    public void UpdateActionTime()
    {
        LastActionDone = Time.time;
    }

    public bool CanWeDoAction()
    {
        var canWeDoAction = true;
        if (LastActionDone.HasValue)
        {
            var secondsSinceLastAction = Time.time - LastActionDone;
            canWeDoAction = secondsSinceLastAction > IntervalSeconds;
        }

        return canWeDoAction;
    }
}

Update 1

With a tip from Petr Kolda (Facebook), I've now modified the class to use Time.time instead of DateTime.Now.

Thursday, September 5, 2013

Unity Helper Methods #4: InvokeInSeconds

/// <summary>
/// Invokes an action after waiting for a specified number of seconds
/// </summary>
/// <param name="waitSeconds">The number of seconds to wait before invoking</param>
/// <param name="invoke">The action to invoke after the time has passed</param>
public static IEnumerator InvokeInSeconds(float waitSeconds, Action invoke)
{
    yield return new WaitForSeconds(waitSeconds);
    invoke();
}

Typical Usage

Now I know that Unity already has its own Invoke method but Unity's method only accepts a string specifying the method name.

I wrote this method to be able to specify an anonymous lambda instead of the string.

Note that the method's return type is IEnumerator since it yields, therefore we must invoke it with StartCoroutine.

StartCoroutine(InvokeInSeconds(0.5f, () => Destroy(gameObject))); // Destroy the gameObject in 0.5 seconds

Unity Helper Methods #3: GetRandomEnum

/// <summary>
/// Returns a random enum from the specified enum type
/// </summary>
/// <typeparam name="T">The enum</typeparam>
public static T GetRandomEnum<T>()
{
    Array values = Enum.GetValues(typeof(T));
    return  (T)values.GetValue(UnityEngine.Random.Range(0, values.Length));
}

Typical Usage

Fairly simple; returns a random enum value from an enum type.
enum EnemyModels
{
    Knight,
    FrailOldLady,
    Copernicus,
    BrianMay,
    MalboroGuy
}

void SpawnEnemy() 
{
    EnemyModels modelType = GetRandomEnum<EnemyModels>();
    // Now we have a random enemy model type.
}

Unity Helper Methods #2: BoxCollider.GetPointInCollider

/// <summary>
/// Returns a random world point inside the given BoxCollider
/// </summary>
public static Vector3 GetPointInCollider(this BoxCollider area)
{
    var bounds = area.bounds;
    var center = bounds.center;

    var x = UnityEngine.Random.Range(center.x - bounds.extents.x, center.x + bounds.extents.x);
    var z = UnityEngine.Random.Range(center.z - bounds.extents.z, center.z + bounds.extents.z);

    return new Vector3(x, 0, z);
}

I normally use this method to get a random spawnpoint within my spawn area represented with a BoxCollider (set to a trigger of course).

Notice how I hardcode Y to 0 because the Y position is irrelevant to me since that is set by code outside of this method.

public BoxCollider spawnArea;

void SpawnWhatever() 
{
    Vector3 spawnPoint = spawnArea.GetPointInCollider();
    // Spawn something at the random spawnpoint we got
    // ...
}

Unity Helper Methods #1: Animator.SetLayerWeights

/// <summary>
/// Sets the weight of all the layers in the specified Animator
/// </summary>
/// <param name="animator">The animator</param>
/// <param name="totalLayers">The number of layers this animator contains</param>
/// <param name="weight">The value of the weight</param>
public static void SetLayerWeights(this Animator animator, int totalLayers, float weight)
{
    for (int i = 0; i < totalLayers; i++)
    {
        animator.SetLayerWeight(i + 1, weight);
    }
}

Description

Starting with a fairly trivial method; setting the weight of 'all' the layers of an Animator. When a game starts, Unity by default sets all the layers of the Animators' Controllers to 0.

Unfortunately, the method needs to be supplied with the number of layers that the Animator contains because I haven't yet found a way how to get the number of layers programmatically.

Typical Usage

I use this method at the start of a game to set the weight of all the layers to 1.

So, if I know that I have 4 layers for a particular Animator:
animator.SetLayerWeights(4, 1); // Sets the weight of all (4) the layers of my animator

Tuesday, May 7, 2013

Coloring individual characters in an NGUI UILabel text

For the game project that I'm currently working on, I needed to find an easy way to color individual characters in the text of an NGUI UILabel.

Fortunately, the solution is pretty simple. When the supportEncoding boolean field on a UILabel is set to true, the text supports color encoding in the [RRGGBB] format.

This means that we can have write text such as the following (the [-] is used to revert to a previous color):

[FF0000]Red[-] [00FF00]Green[-] [0000FF]Blue[-]


The reason I needed to do this was because we want the leading zeros in the Score UILabel to have a different colour than the actual score. And for that, I wrote this neat little method to format my current score to a string with a predefined number of leading zeros and then color those leading zeros independent from the main colour of the label text.

private string FormatScore(int score, string leadingZerosRGBColor, int totalDigits)
{
    var scoreString = score.ToString(CultureInfo.InvariantCulture);
    var zeros = totalDigits - scoreString.Length;
    if (score == 0)
    {
        scoreString = String.Empty;
        zeros++;
    }

    return String.Format("[{0}]{1}[-]{2}", leadingZerosRGBColor, new string('0', zeros <= 0 ? 0 : zeros), scoreString);
}

And the end result pretty much looks like our designer intended:


Thursday, April 11, 2013

Showing a Kongregate user's avatar image in a Unity 3D game

I decided that the game I'm currently working on is going to be tied to Kongregate, and since I'm doing that, might as well try to use as many features of the API as I can.

One of the features I'm trying to integrate in my game is the ability to render a Kongregate user's avatar in the game itself. For this tutorial, I will be using Kongregate's JSON REST API to fetch user data.

After skimming through the Kongregate API documentation, I found the page about the user-info REST call.

The url for a user-info call is formatted as follows: http://www.kongregate.com/api/user_info.json?username=<username> where username is obviously the username for the user account you're searching for.

This provides you with a response such as the following:

{
   "friends":[],
   "muted_users":[],
   "friend_ids":[],
   "muted_user_ids":[],
   "user_id":3590097,
   "username":"agnt666",
   "private":false,
   "page_num":1,
   "num_pages":1,
   "success":true,
   "user_vars":{
      "username":"agnt666",
      "level":3,
      "points":165,
      "avatar_url":"http://cdn4.kongcdn.com/assets/resize-image/50x50/assets/avatars/defaults/ant.png",
      "chat_avatar_url":"http://cdn4.kongcdn.com/assets/resize-image/16x16/assets/avatars/defaults/ant.png",
      "developer":false,
      "moderator":false,
      "admin":false,
      "gender":"Male",
      "age":25,
      "game_title":"Typocalypse 3D",
      "game_url":"http://www.kongregate.com/games/agnt666/typocalypse-3d"
   }
}

And the above response provides me with what I needed; the avatar url:

"avatar_url" : "http://cdn4.kongcdn.com/assets/resize-image/50x50/assets/avatars/defaults/ant.png"


Getting the avatar url in C#
Getting the username of the current Kongregate logged-in user is beyond the scope of this post (TODO: maybe in another one), so for this code I'm assuming you already have it.

public UITexture kongregateTexture;

IEnumerator FetchUserDetails(string username) {
    // Build the url for the REST call
    var detailsUrl = String.Format("/api/user_info.json?username={0}", username);

    // Do the call 
    var www = new WWW(detailsUrl);

    // ...and wait until we get back a response
    yield return www;

    // Get the JSON response text
    var responseText = www.text;

    // Deserialize it into a statically typed object to read to be able to read it's contents
    // For this demo, I'm using this JSON deserializer script: https://raw.github.com/gist/1411710/MiniJSON.cs
    var deserialized = MiniJSON.Json.Deserialize(responseText) as Dictionary<string,object>;

    //// TODO: a null check would be nice here

    // Get the user_vars object
    var userVars = deserialized["user_vars"] as Dictionary<string,object>;

    // Read the avatar url
    var avatar_url = user_vars["avatar_url"].ToString(); // http://cdn4.kongcdn.com/assets/resize-image/50x50/assets/avatars/defaults/ant.png

    //// Do the same routine to fetch the image
    var wwwAvatar = new WWW(avatar_url);
    yield return wwwAvatar;

    // And now we have the texture!
    Texture2D avatarTexture = wwwAvatar.texture;

    // Render the texture (I'm using an NGUI SimpleTexture widget)
    kongregateTexture.mainTexture = avatarTexture;
}

And this is the result with a shitty border I made around it:


Possible exception: Security Exception: No valid crossdomain policy available to allow access
Notice that in the above code, to build the url of the REST call, I used Kongregate's relative url: "/api/user-info.json...".

If I had used this instead String.Format("http://www.kongregate.com/api/user_info.json?username={0}", username);, I would have received this exception when running the game and looking at the debug log (console):


This error is thrown when reading the text field of the WWW instance (get_text).

So be very careful about that when doing the REST calls; always use relative urls! ...and this of course works because the game is hosted on http://www.kongregate.com.

Monday, April 8, 2013

Auto-Generating generic Tuple classes with T4 in C#

And yet again, here's another perfect example for using the T4 code generation toolkit in Visual Studio.

For a recent project, I wanted to use the Tuple class provided in the .NET Framework...problem was, I was stuck with .NET 3.5 and the Tuple class was introduced in version 4 of the framework. So, instead of writing a single Tuple class by hand (which would have been very trivial to do), I decided to write a T4 template which would generate all the Tuple classes I needed automatically.

The template itself is very trivial and the number of Tuple classes it generates is dependent on the value that I specify in the max variable at the top of the template.

For each of the Tuple classes the template generates, it creates a contructor which accepts all of the properties that the tuple will contain and also the actual properties that will be accessed from the outside.

Here's an example of what the template autogenerates for me when using max = 3 (granted, the first class it generates is a bit pointless but that can be easily omitted from within the template if it bothers you):
namespace FunWithTuples
{
    /// <summary>
    /// Represents a 1-tuple
    /// </summary>
    public class Tuple<T1>
    {
        public T1 Item1 { get; set; }

        public Tuple(T1 item1) 
        {
            Item1 = item1;
        }
    }

    /// <summary>
    /// Represents a 2-tuple
    /// </summary>
    public class Tuple<T1, T2>
    {
        public T1 Item1 { get; set; }
        public T2 Item2 { get; set; }

        public Tuple(T1 item1, T2 item2) 
        {
            Item1 = item1;
            Item2 = item2;
        }
    }

    /// <summary>
    /// Represents a 3-tuple
    /// </summary>
    public class Tuple<T1, T2, T3>
    {
        public T1 Item1 { get; set; }
        public T2 Item2 { get; set; }
        public T3 Item3 { get; set; }

        public Tuple(T1 item1, T2 item2, T3 item3) 
        {
            Item1 = item1;
            Item2 = item2;
            Item3 = item3;
        }
    }
}


And this is the full T4 Template:

<#@ template debug="false" hostspecific="false" language="C#" #>
<#@ assembly name="System.Core" #>
<#@ import namespace="System.Linq" #>
<#@ import namespace="System.Text" #>
<#@ import namespace="System.Collections.Generic" #>
<#@ output extension=".cs" #>

<#
var max = 3; // The total number of classes to generate
#>
namespace FunWithTuples
{
<#
max += 1;
for (var i = 1; i < max; ++i) {
#>
    /// 
    /// Represents a <#=i#>-tuple
    /// 
    public class Tuple<#=GetGenericTypesSignature(i)#>
    {
<#
for (var j = 1; j < i + 1; ++j) {
#>
        public T<#=j#> Item<#=j#> { get; set; }
<#
}
#>

        public Tuple(<#=GetConstructorArguments(i)#>) 
        {
<#
for (var j = 1; j < i + 1; ++j) {
#>
            Item<#=j#> = item<#=j#>;
<#
}
#>
        }
    }

<#
}
#>
}
<#+
    public string GetGenericTypesSignature(int total) {
        return String.Format("<{0}>", String.Join(", ", Enumerable.Range(1, total).Select(n => "T" + n).ToArray()));
    }

    public string GetConstructorArguments(int total) {
        return String.Join(", ", Enumerable.Range(1, total).Select(n => String.Format("T{0} item{0}", n)).ToArray());
    }
#>


Friday, April 5, 2013

Common CIL incantations

Since I recently decided to try my hand at CIL by writing assemblies by hand, I'm now writing this post where I will list down a couple of basic CIL routines.

I am of course primarily writing this post for myself so that future me will have a reference if he (I?) decides to do something with it again.

Hello World
.assembly helloworld {}
.assembly extern mscorlib {}

.method public static void Main () {
    .entrypoint
    ldstr "Hello World!"
    call void [mscorlib]System.Console::WriteLine(string)
    ret
}
Including external assemblies
.assembly extern mscorlib {}
Pushing a 32 bit integer constant to the stack
ldc.i4 42
Pushing a 64 bit integer constant to the stack
ldc.i8 829190
Pushing a string constant to the stack
ldstr "Andreas"
Declaring and loading unnamed variables (popping elements off the stack)
.locals init (int32, string) // init specifies that the variables must be initialized to the default types
ldc.i4 42
stloc.0 // storing the 32 bit integer at position 0 by popping it off the stack
ldstr "CIL"
stloc.1
Defining a class
.class MathHelpers extends [mscorlib]System.Object {
    .method void .ctor() { // Constructor
        ldarg.0
        call instance void [mscorlib]System.Object::.ctor()
    }

    .method public instance int32 Inc(int32) { // Instance method; the instance keyword can be omitted
        ldarg.0
        ldc.i4.1
        add
        ret
    }
    
    .method public static int32 Add(int32 n, int32 m) {  // Static method
        ldarg n
        ldarg m
        add
        ret
    }
}
Invoking methods from external assemblies
.assembly extern mscorlib {}

// ...

ldstr "Writelining"
call void [mscorlib]System.Console::WriteLine(string)
Invoking an instance method
.locals init (class MathHelpers mh)

newobj instance void MathHelpers::.ctor()
stloc mh

call instance void MathHelpers::Show()
Invoking a static method
call void MyNamespace.MyClass::StaticMethod()
Using an array
.locals init (string[] names);

.ldc.i4.4 // the int32 constant that's used for the size of the array: new string[4]
newarr string
stloc names

// Add element 0
ldloc names
ldc.i4.0 // array index
ldstr "Dreas"
stelem.ref

// Add element 1
ldloc names
ldc.i4.1 // array index
ldstr "John"
stelem.ref

Adding a line break for IntelliSense in XML documentation comments

This is a quick post on how to insert a line break for XML documentation comments in C#.

The easiest way I've found is to use a non breaking space (ASCII code 255) in combination with the paragraph tags: <para>

To insert the non breaking space, press ALT + 255 (from the numeric keypad).

Here's an example:

/// <summary>
/// <para>This method does everything.</para>
/// <para> </para>
/// <para>...and I mean everything.</para>
/// </summary>
private void DoEverything() {

And this is how it looks in IntelliSense:


Wednesday, December 19, 2012

Auto-Generating EventArgs classes with T4

T4 is a code generator built into Visual Studio. In this post, I will present a T4 template file which I've used to help auto-generate Event Arguments classes in C#.

Normally, event arguments classes always follow the same structure. You typically have a set of public properties in a class which extends EventArgs and a constructor which takes in the same number of formal arguments.

Here's a typical event arguments class:

public class OperationCompletedEventArgs : EventArgs
{
    public bool Result { get; private set; }

    public OperationCompletedEventArgs(bool result)
    {
        Result = result;
    }
}

Given the repetitive nature of how typical event arguments classes are structured, they make a perfect fit for an example of code generation.


The intent of my template file for generating event arguments classes is to be able to define a declaration of what classes I want to be generated and then let the template generate those classes for me.

The declaration part of the template looks something like this:

var collection = new List<EventArgumentsRepresentation>
                 {
                     new EventArgumentsRepresentation("OperationCompleted")
                     {
                         Members = new Dictionary<string, string> { 
                             {"Result", "bool"}
                         }
                     },
                     new EventArgumentsRepresentation("GenericAndPartial")
                         {
                             AccessModifier = "internal",
                             IsPartial = true,
                             GenericTypes = new List<string>() { "T", "TK"},
                             Members = new Dictionary<string, string> { 
                                 {"GenericMember1", "T"},
                                 {"GenericMember2", "TK"}
                             }
                         }
                 };


Given the above structure, the template would then generate the following two classes for me:

public class OperationCompletedEventArgs : EventArgs
{
    public bool Result { get; private set; }

    public OperationCompletedEventArgs(bool result) 
    {
        Result = result;
    }
}

internal partial class GenericAndPartialEventArgs<T, TK> : EventArgs
{
    public T GenericMember1 { get; private set; }
    public TK GenericMember2 { get; private set; }

    public GenericAndPartialEventArgs(T genericMember1, TK genericMember2) 
    {
        GenericMember1 = genericMember1;
        GenericMember2 = genericMember2;
    }
}

The next I would want a new event arguments class, I would just add a new instance of EventArgumentsRepresentation to the list and let the template do the work.


And now, for the entire template file. If you want to use it for your own projects, create a new "Text Template" (.tt file) in Visual Studio and copy the below template into it. Once you then save the template file, the classes will be generated into a .cs file.

<#@ template debug="false" hostspecific="false" language="C#" #>
<#@ assembly name="System.Core" #>
<#@ import namespace="System.Linq" #>
<#@ import namespace="System.Collections.Generic" #>
<#@ output extension=".cs" #>

<#
var namespaceName = "EventArgumentsGenerationDemo";
var usings = new List<string> {
    "System",
};

var collection = new List<EventArgumentsRepresentation>
                 {
                     new EventArgumentsRepresentation("OperationCompleted")
                     {
                         Members = new Dictionary<string, string> { 
                             {"Result", "bool"},
                         },
                     },
                     new EventArgumentsRepresentation("GenericAndPartial")
                         {
                             AccessModifier = "internal",
                             IsPartial = true,
                             GenericTypes = new List<string>() { "T", "TK"},
                             Members = new Dictionary<string, string> { 
                                 {"GenericMember1", "T"},
                                 {"GenericMember2", "TK"},
                             },
                         },
                     
                 };
#>
namespace <#=namespaceName#>
{
<#
foreach (var usingDirective in usings) {
#>
    using <#=usingDirective#>;
<#
}
#>

    /*
     * This file is autogenerated.  
     *
     * If you want to edit anything from here, use the EventArgumentsClasses.tt file.
     */

<#
foreach (var eventArgsRepresentation in collection) {
#>
    <#=eventArgsRepresentation.ClassSignature#>
    {
<#
foreach (var member in eventArgsRepresentation.Members) {
#>
        public <#=member.Value#> <#=EventArgumentsRepresentation.ToPascalCase(member.Key)#> { get; private set; }
<#
}
#>

        public <#=eventArgsRepresentation.ClassName#>(<#=eventArgsRepresentation.GetConstructorArguments()#>) 
        {
<#
foreach (var member in eventArgsRepresentation.Members) {
#>
            <#=EventArgumentsRepresentation.ToPascalCase(member.Key)#> = <#=EventArgumentsRepresentation.ToCamelCase(member.Key)#>;
<#
}
#>
        }
    }

<#
}
#>
}

<#+
internal class EventArgumentsRepresentation
{
    public string ClassName { get; private set; }

    public string AccessModifier { get; set; }
    public bool IsPartial { get; set; }
    public List<string> GenericTypes {get; set;}
    public Dictionary<string, string> Members { get; set; }
    public string ClassSignature {
        get {
            return String.Format("{0} {1}class {2}{3} : EventArgs", AccessModifier, IsPartial ? "partial " : "", ClassName, GetGenericTypesSignature());
        }
    }

    public EventArgumentsRepresentation(string name)
    {
        ClassName = String.Format("{0}EventArgs", ToPascalCase(name));
        AccessModifier = "public";
        GenericTypes = new List<string>();
        Members = new Dictionary<string, string>();
    }

    public string GetGenericTypesSignature() {
        if (GenericTypes.Count < 1) {
            return "";
        }

        return String.Format("<{0}>", string.Join(", ", GenericTypes.ToArray()));
    }

    public string GetConstructorArguments() {
        if (Members == null || Members.Count < 1) {
            return "";
        }

        return String.Join(", ", Members.Select(k => String.Format("{0} {1}", k.Value, ToCamelCase(k.Key))).ToArray());
    }

    public static string ToPascalCase(string text) {
        return char.ToUpper(text[0]) + text.Substring(1);
    }

    public static string ToCamelCase(string text) {
        return char.ToLower(text[0]) + text.Substring(1);
    }
}
#>

Thursday, October 25, 2012

Fixing "Not a debug ModuleBuilder." thrown by SetLocalSymInfo

This was the first problem I had when I started playing with CIL and emitting CIL code with C#'s Emit; an InvalidOperationException: Not a debug ModuleBuilder:


The reason this was happening was because of this line:

ModuleBuilder mb = ab.DefineDynamicModule(an.Name, "MainModule");

The DefineDynamicModule has an overload which lets you specify whether symbol information should be emitted, and by default it's false.

By setting this emitSymbolInfo argument to true, it will also emit the pdb file for your assembly.

So I passed in the argument and my problem was solved:
ModuleBuilder mb = ab.DefineDynamicModule(an.Name, "MainModule", true);

Monday, October 15, 2012

Taking a screenshot of an application in C#

Recently I needed a way to take screenshots of applications programmatically in C# and I wrote this small application to accomplish that task for me.

You can find the source here: https://github.com/dreasgrech/Screenshotter.

The only requirement I had was that I supply the pId (process ID) and the application takes a screenshot of that process for me...but the application can be very easily extended to accept a process name or anything that can identify a process.


Sunday, October 14, 2012

Cracking .NET applications - a simple tutorial

For this tutorial, I will be making use of Reflector and a plugin for Reflector called Reflexil, and also Gray.Wolf to partially view unobfuscated C# code.

Patching the CIL with Reflexil

Here is a very trivial example of how a simple application can validate a license key:
static void Main(string[] args)
{
    var invalidKey = "48011147";

    if (LicenseManager.Verify(invalidKey))
    {
        Console.WriteLine("Thank you for buying our product!");
    } 
    else
    {
        Console.WriteLine("Invalid license key; continue evaluation.");
    }
}
static class LicenseManager
{
    private static string validKey = "112358";

    public static bool Verify(string key)
    {
        return key == validKey;
    }
}
From the code, it's fairly easy to see that to bypass the license key validation logic in our application, we simply need to modify the LicenseManager.Verify method to just return true rather than check for the valid license key.

Running the unmodified application yields the following, since the equality check obviously fails:


So now let's start patching the application by first doing some reconnaissance. Fire up Reflector, add our compiled exe file and navigate to the LicenseManager.Verify method:


Now there are couple of ways we can modify the code with Reflexil...but let's start with the harder way, by modifying the CIL code directly.

If you look at the current CIL, we see that we have four operations: ldarg.0, ldsfld, call and ret:


Here's what's going on:
  1. ldarg.0 loads and pushes the actual argument at position 0 (string key) to the stack.
  2. ldsfld loads and pushes the value of the static field validKey ("112358") to the stack.
  3. call invokes the System.String::op_Equality(string, string) method by popping the last two values from the stack, comparing them and then popping the returned boolean value on the stack.
  4. ret pops and returns the value that the op_Equality last pushed on the stack.

Now that we know what's going on, we need to change these instructions to simply return true rather than comparing the strings.

This means that our code should instead do:
  1. ldc.i4.1 to push the constant value of 1 onto the stack.
  2. ret to pop and return that value.

Note that if we didn't know how to actually write a method which just returns true in CIL, we could have simply wrote the method in C#, compiled it and then view it's corresponding CIL with Reflector:


As for why you see a .maxstack in the above examples, you can find a pretty good explanation here. It seems that this is used by analysis tools.

Using Reflexil, we can now remove the existing operations and replace them with our desired code:


Once that's done, we should now save our modified executable:


Running our newly patched compilation now shows:


Which is exactly what we strived for, since the validation logic has now been eliminated!

Opening our patched application in Reflector, we can now see the new code:


Patching by modifying the C# code directly

Using Reflexil, there's an even easier way of patching our code...by actually writing C# code rather than CIL!

Using a modified version of our first application from the previous example, we will now patch the code by writing C# code.

This is our new, slightly more "complex" licensing code:
static void Main(string[] args)
{
    var invalidKey = "48011147";

    if (LicenseManager.Verify(invalidKey) )
    {
        Console.WriteLine("Purchased license: {0}", LicenseManager.LicenseType);
    } 
    else
    {
        Console.WriteLine("Invalid license key; continue evaluation.");
    }
}
static class LicenseManager
{
    private static string validKey = "112358";
    public static string LicenseType { get; set; }

    public static bool Verify(string key)
    {
        if (key == validKey)
        {
            LicenseType = "Enterprise";
            return true;
        }

        return false;
    }
}

Notice how now, for the validation process to properly succeed, we need to set the LicenseKey property to "Enterprise" before returning true from the method.

Now of course, we can do this in CIL again, but this time we'll use a much easier method.

Open up the application with Reflector, but this time, instead of changing the CIL opcodes directly, right click the Reflexil window and choose "Replace all with code...":


This will bring up this window:


From here, we now need to type in the code that will set the LicenseType property to "Enterprise" and then return true from the method. After you input the code and press the Compile button, you should end up with the following:


Looking at the generated CIL code, we see the opcodes from before:
  1. ldstr to load the "Enterprise" string onto the stack.
  2. call which invokes the set_LicenseType method (Properties in C# are just syntactic sugar for fields and their backing get/set methods) by popping the "Enterprise" string and using it as an actual argument.
  3. ldc.i4.1 to push the integer 1 on the stack.
  4. ret for popping and returning our boolean.

Saving and running our patched application, we now get:


What if the assembly is obfuscated!?

Sometimes, when you try to open a .NET assembly with Reflector, you will be slapped in the face with this message:


Or, even worse, when I obfuscated the last example program we wrote with a trial version of babelfor.NET, Reflector crashed when I tried to open our LicenseManager.Verify method:


Note though that Reflexil still shows us the CIL code, so we don't have any problems when we need to work with CIL code directly...although it will be a bit harder to understand the code by looking at the CIL code only.

And also, if you change the language in Reflector to IL, you will prevent it from crashing but of course you still won't be able to view the raw C# code:


But what we want to do for now is to find a way to view unobfuscated C# code, and that's where an application such as Gray.Wolf comes to the rescue!

Opening our application in Gray.Wolf and navigating to the Verify method, we get:


As you can see from the right pane, it couldn't completely deobfuscate all of our code for this example but it's at least giving us a very good hint as to what's going on without studying the CIL code.

From the C# code, we can see that there is an if-statement and although Gray.Wolf couldn't deobfuscate the two operands used in the statement, we can make out what they are from the CIL code because the two values that are pushed on the stack before the op_Equality is called are done using ldarg.0 which loads the first only actual argument in the method and ldsfld which loads a value from a static field and since the only possible static that we have which makes sense to compare to is validKey, we can be pretty certain that it's using that value.

Wednesday, November 30, 2011

Conway's Game of Life in XNA

The following video demonstrates an implementation of Conway's Game of Life I once wrote in in XNA.


Unfortunately, I currently don't have the source code for this online but I'll post it once I stop procrastinating.

Saturday, September 17, 2011

Finding a YouTube video title by scraping

I was recently writing a tool in C# and I needed a way to get a YouTube video title. I could have used the YouTube API but I wasn't bothered about setting everything up and going through the documentation, so I decided to scrape the title off the video page itself.

For this, I first wrote a very simple way to execute a GET request and return the response (Removed all forms of error checking for brevity):
public static string ExecuteGETRequest(string url)
{
    var request = (HttpWebRequest)WebRequest.Create(url);

    using (var response = (HttpWebResponse)request.GetResponse())
    {
        var reader = new StreamReader(response.GetResponseStream());

        return reader.ReadToEnd();
    }
}
And here's the method that does the task at hand:
public static string GetYouTubeVideoTitle(string youtubeLinkUrl)
{
    string response = ExecuteGETRequest(youtubeLinkUrl),
             title = response.Substring(response.IndexOf("<title>\n") + 8);

    title = title.Substring(0, title.IndexOf("\n"));
    return title.Trim();
}

Usage

var title = GetYouTubeVideoTitle("http://www.youtube.com/watch?v=TY9jN6hm3N0"); // "Wicked Lady - Ship of Ghosts (Part 1 of 2) 1972"
Be wary of using this method for extracting titles because it could potentially break in the future due to changes in how YouTube renders the page with HTML; but it may be useful for quick scripts.

Checking for link validity

If you want to make sure the given link actually points to a YouTube video, you can use something like this:
public static bool IsValidYoutubeLink(string youtubeLink)
{
    // Regular expression from http://www.regexlib.com/REDetails.aspx?regexp_id=2569
    return Regex.IsMatch(youtubeLink, @"^http://\w{0,3}.?youtube+\.\w{2,3}/watch\?v=[\w-]{11}");
}


Sunday, September 11, 2011

Generating a list of links for a user's YouTube uploads

This is a very simple application I just wrote to generate a list of all of the video upload links given a YouTube user.

Download

Since this was such a small project, I didn't see fit to have a github repository for it so I just uploaded it to my hosting server.

Download the exe (release) file from: http://dreasgrech.com/upload/youtubeuseruploads/YouTubeUserUploads.exe

And the source: http://dreasgrech.com/upload/youtubeuseruploads/YouTubeUserUploads-source.zip
It won't be the best code you'll ever see, but it does the job for the task at hand.

Usage

YouTubeUserUploads.exe <username> [file]


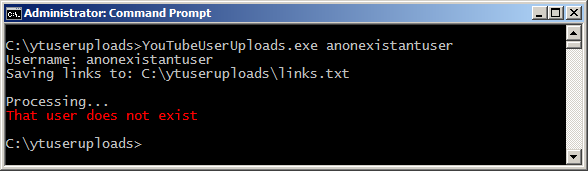
If [file] is not given, a file links.txt will be created in the current directory.

Demo

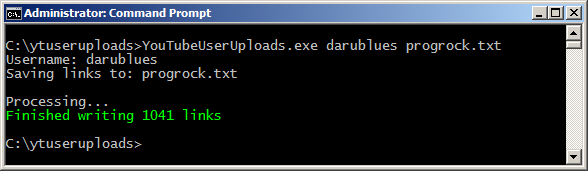
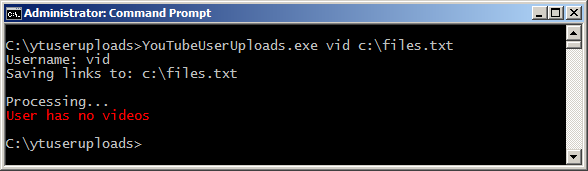
Here's an example run using my YouTube username:

C:\YouTubeUserUploads.exe agnt666 uploads.txt
Username: agnt666
Saving links to: uploads.txt

Processing...
Finished writing 3 links

That would create (or overwrite) a text file called links.txt and write the links to my three currently uploaded videos at the time of writing:
http://www.youtube.com/watch?v=rsXnEpWyeEg
http://www.youtube.com/watch?v=sxBiD7u7nx8
http://www.youtube.com/watch?v=Ri2SHGZaSqs

Screenshots


Sunday, February 13, 2011

StringEvolver: Evolving strings with a genetic algorithm

This is my first attempt at experimenting with a genetic algorithm. The following is an application that evolves a string given a destination to converge to.


Here is an example run:
> StringEvolver -m 0.25 -s 0.6 -c 2000 -e 0.1 --fitness=hamming --ctype=one -t 0.3 "Charles Darwin was right!"

Evolution Destination: Charles Darwin was right!
Mutation Rate: 25%
Crossover Rate: 60%
Truncation Rate: 30%
Chromosomes / population: 2000
Elitism / population: 200 (0.1%)
Fitness Calculator: Hamming Distance
Crossover Type: One Point

    1: L<eI`Y@ D#raF'JKJ7DUAg"GR
    2: L<eI`Y@ D#raF'JKJ7DUAg"GR
    3: chNOLe"5]={Iiyrgk*,rEpE/!
    4: L<eI`Y@ D#ra nR$C1SrYqha+
    5: L<eI`Y@ D#ra nR$C1SrYqha+
    6: lpa5`Y@ D#ra nR$C8y.iqrt5
    7: C]Y&hJ1 %aRwi< aaB,r_Zh68
    8: 1s[r.ts %aGwi< _a"=rjXyN!
    9: chNOlFsyD#rwi< }aB,r_Zh68
   10: chNO9e" D#rwi< }aB=rPgh6!
   11: chNO9e" D#rwi< }aB=rPgh6!
   12: 1s[r.Ks D#ra n}way rAght!
   13: C}hplFs D#rwi.}way rPgh6!
   14: C'aclos Da{]inrwas r.ghx!
   15: C'aclos Da{]inrwas r.ghx!
   16: ChNrlFs Da>win}was  `gha!
   17: ChNrlFs Da>winlwas r;gh6!
   18: Ch[rlFs Da>wi< was rAght!
   19: Chacle@ D#rwin was rjght!
   20: Chacle@ D#rwin was rjght!
   21: ChNrles Darwin}was rAght!
   22: ChNrles Darwin}was rAght!
   23: Charles Darwin}was r`ght!
   24: Charles Darwin}was r`ght!
   25: Charles Darwin was rAght!
   26: Charles Darwin was rAght!
   27: Charles Darwin was rAght!
   28: Charles Darwin was rAght!
   29: Charles Darwin was rAght!
   30: Charles Darwin was right!

Found in 30 generations
Time Taken: 00:00:00.4730271

Source

You can download the source from github: https://github.com/dreasgrech/StringEvolver

Command Line arguments

-m, --mutation=VALUE
A value between 0-1

The mutation rate determines the probability of how often a selected chromosome mutates. Mutation is very important in a genetic algorithm because it helps in keeping diversity in the population, thus avoid local minima which can slow or even halt further evolution.

The application currently uses a mutation operator called Single Point Mutation. For our current application, it works by randomly selecting a point in the string and switching the character at that point to another random character.

As an example, say the chromosome to be mutated currently contains the string "aBcdE". The single point mutation operator then randomly chooses position 2 (0-based) and replaces the character 'c' with the randomly chosen character 'W'.

This way, the chromosome "aBcdE" has now been mutated to "aBWdE".

-s, --crossover=VALUE
A value between 0-1

The crossover rate determines how often two selected chromosomes are sexually combined to produce two separate offspring.

For this application, there are two available crossover operations: One Point Crossover and Two Point Crossover. These operators are discussed further in the ctype argument.

-e, --elitism=VALUE
A value between 0-1

The elitism rate determines the number of the fittest solutions that are directly (untouched) transferred to the advancing population.

Elitism can help in preventing the potential loss of possibly good solutions and can lead to quicker convergence.

-c, --crcount=VALUE
A value greater than 1

The chromosome count determines the number of chromosomes that each population will have. The greater the number of chromosomes, the more time a population takes to advance to the next.

--fitness=VALUE
VALUE = sum, levenshtein or hamming

The fitness calculator determines which algorithm is used to calculate how fit a given chromosome is.

There are currently three fitness calculators to choose from:

Sum
The sum calculator calculates the ASCII difference between each character of the target strings.
public override double CalculateFitness(Chromosome ch)
{
    var distanceToTarget = Target.Select((t, i) => Math.Abs(t - ch.Value[i])).Sum();
    return 1.0 / distanceToTarget;
}
Levenshtein Distance
The Levenshtein distance between two strings is the minimum number of edits needed to transform one string into the other. The transformation can include insertion, deletion and substitution. This distance is also referred to as the edit distance.
public override double CalculateFitness(Chromosome ch)
{
    return 1.0 / LevenshteinDistance(ch.Value, Target);
}
Hamming Distance
The Hamming distance between two strings of equal length is the number of positions at which the corresponding symbols are different. The reason Hamming distance requires the strings to be of equal length is because unlike the Levenshtein distance, the Hamming distance only allows substitutions.

As an example, the Hamming distance between "janica" and "jenixo" is 3.
public override double CalculateFitness(Chromosome ch)
{
    if (ch.Value.Length != Target.Length)
    {
        return 1.0 / double.PositiveInfinity;
    }

    var difference = 0;
    for (int i = 0; i < Target.Length; i++)
    {
        if (ch.Value[i] != Target[i])
        {
            difference++;
        }
    }
    return 1.0 / difference;
}

--ctype=VALUE
VALUE = one or two

The crossover type determines which crossover operator is to be used when sexually combining two chromosomes.

There are currently two available methods to choose from:

One
The One-Point Crossover method chooses a random point (called a locus) in the string and all the data beyond that point in either chromosome is swapped between the parent chromosomes. The resulting two chromosomes are the children.
public Tuple<Chromosome, Chromosome> Crossover(Chromosome c1, Chromosome c2)
{
    var locus = random.Next(0, c1.Value.Length + 1);
    string ch1 = c1.Value.Substring(0, locus) + c2.Value.Substring(locus),
           ch2 = c2.Value.Substring(0, locus) + c1.Value.Substring(locus);

    return new Tuple<Chromosome, Chromosome>(new Chromosome(ch1, fitnessCalculator), new Chromosome(ch2, fitnessCalculator));
}

Two
The Two-Point Crossover method is very similar to the One-Point Crossover method but this one chooses two random points along the string rather than one. The data between the two points is swapped and the resulting chromosomes are the children.
public Tuple<Chromosome, Chromosome> Crossover(Chromosome c1, Chromosome c2)
{
    int locus1 = random.Next(0, c1.Value.Length),
        locus2 = random.Next(locus1, c1.Value.Length),
        distance = locus2 - locus1;

    string ch1 = c1.Value.Substring(0, locus1) + c2.Value.Substring(locus1, distance) + c1.Value.Substring(locus2),
           ch2 = c2.Value.Substring(0, locus1) + c1.Value.Substring(locus1, distance) + c2.Value.Substring(locus2);

    return new Tuple<Chromosome, Chromosome>(new Chromosome(ch1, fitnessCalculator), new Chromosome(ch2, fitnessCalculator));
}

-t, --truncate=VALUE
0 < VALUE <= 1

The Truncation value determines how many chromosomes of the current population should be kept and used for the selection, crossover and mutation operations. Note that before the truncation is performed, the chromosomes in the population are sorted in descending order by their fitness, so the fittest chromosomes are kept after the truncation.

A value of 1 uses all of the chromosomes and a value of 0.5 uses half of the population (the better half, of course)